Changing the sector size from 512e to 4kn on a Synology NAS
Eiko WagenknechtEvery few years it’s time to upgrade the storage capacity on my Synology NAS. Usually it’s simple: Remove one drive, put in a larger one, resync them, repeat until all drives are updated. This time, however, what should have been routine turned problematic when my new drive wasn’t recognized.
Table of Contents
What happened?
My previous drives were HGST HUH721212ALN600, 12TB, with a 4k sector size. The new ones are Toshiba MG10AFA22TE, 22TB, with a sector size of 512e or 4kn (selectable).
Turns out that by default they come configured as 512e. DSM unhelpfully does not show this information anywhere and only complains about the new drive being of a different type, but misleadingly suggests that it’s a SATA/SSD mismatch rather than a sector size issue.
How to fix it
To fix it, we need to reformat the drive to 4kn. After trying several Linux commands without success, I found a solution using OpenSeaChest - a command-line utility for managing and configuring storage devices. Despite the name, it worked for my Toshiba drive as well.
- Log into your Synology NAS via SSH.
- Create a temporary dir somewhere. I created it in
/volume1/data/temp. - Change into that directory.
- Download OpenSeaChest portable (you can use a newer version if you want):
wget https://github.com/Seagate/openSeaChest/releases/download/v24.08.1/openSeaChest-v24.08.1-linux-x86_64-portable.tar.xz - Extract it:
tar -xf openSeaChest-v24.08.1-linux-x86_64-portable.tar.xz - Change into the dir:
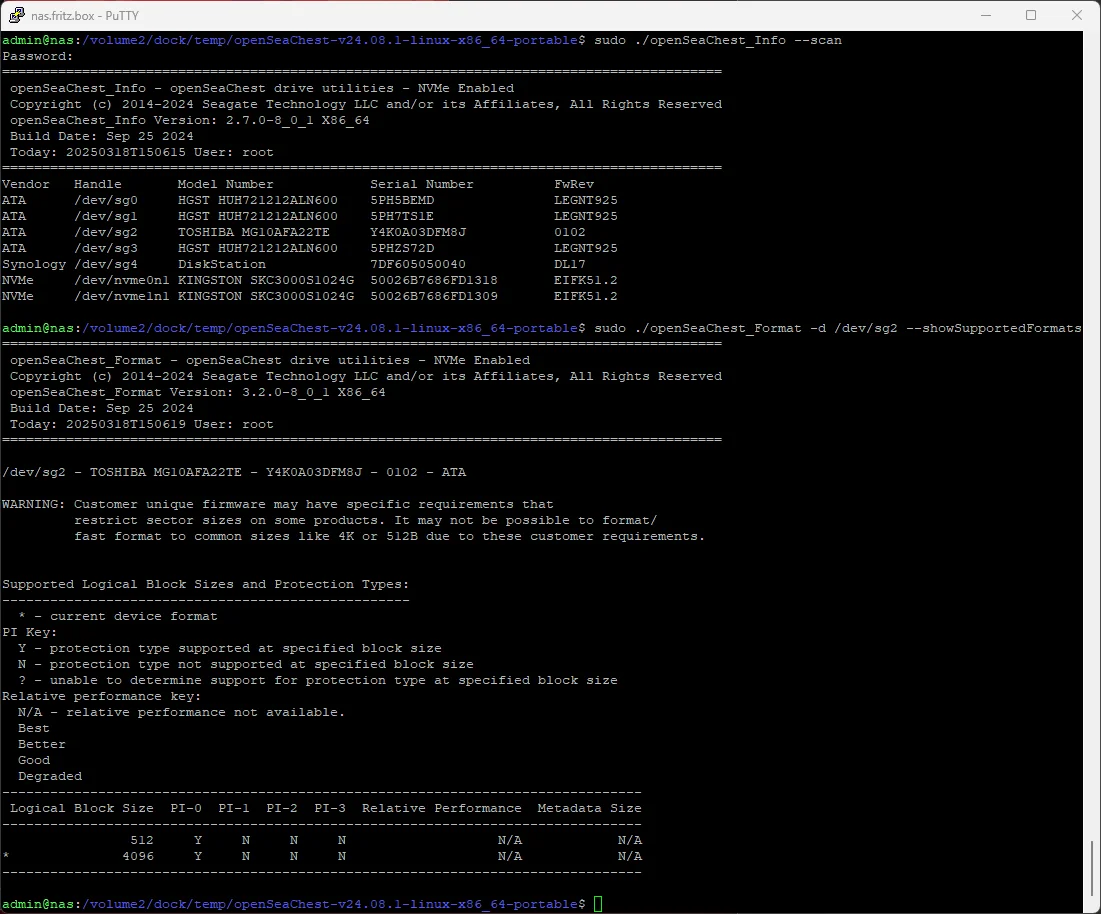
cd openSeaChest-v24.08.1-linux-x86_64-portable - List all drives:
sudo ./openSeaChest_Info --scan. Best identify it via the serial number labeled onto the device. They are not in any sensible order correlating to the physical position. - Show the available sector sizes of drive you want to change (replace
sg2with your drive).sudo ./openSeaChest_Format -d /dev/sg2 --showSupportedFormats - Format it as 4kn:
sudo ./openSeaChest_Format -d /dev/sg2 --setSectorSize 4096 --confirm this-will-erase-data-and-may-render-the-drive-inoperable
This will erase all data on the drive!
After the last command finished (took a minute for me), remove the drive and reinsert it. Then proceed as usual with the repair step in DSM.
Thanks to this post for the inspiration and most of the steps.
No Comments? No Problem.
This blog doesn't support comments, but your thoughts and questions are always welcome. Reach out through the contact details at the bottom of the page.
Support Me
If you found this page helpful and want to say thanks, you can support me here.