Connecting openHAB and Homematic CCU (Setting Up the Binding in openHAB)
Eiko WagenknechtThis post explains how to connect the home automation software openHAB with a Homematic CCU3. After setup, all Homematic devices and variables will be available in openHAB, significantly expanding your home automation possibilities.
Table of Contents
Required Materials
- Homematic CCU3 (e.g., from amazon.de (affiliate link), approx. €140)
- Raspberry Pi for openHAB (e.g., from amazon.de (affiliate link) as a complete kit, approx. €80)
Prerequisites
The Homematic CCU3 and openHAB must already be set up. For openHAB 2, I’ve written a guide here.
1) Preparing the CCU
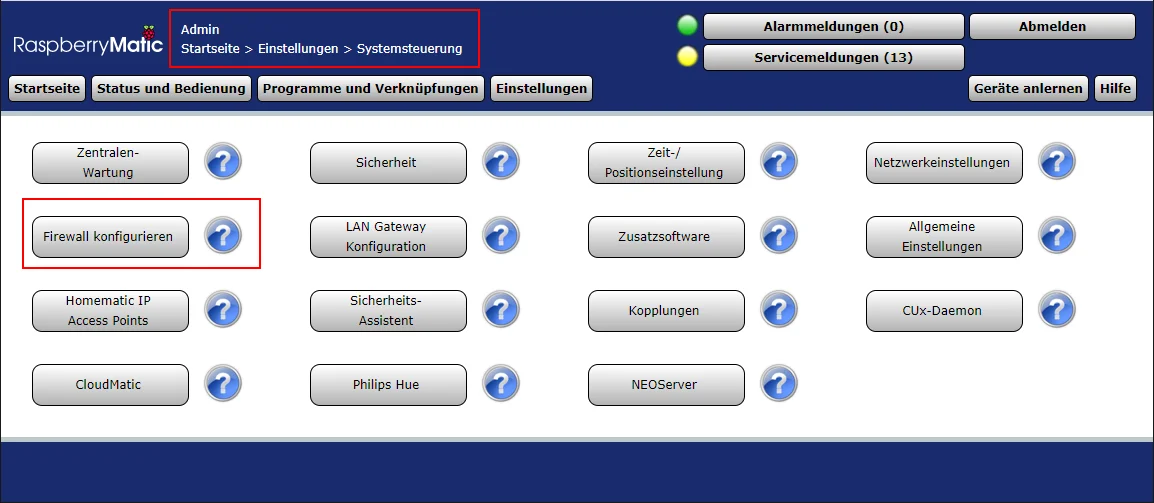
For openHAB to connect to the Homematic CCU, you need to configure several permissions. This is done in the CCU interface under System Settings.
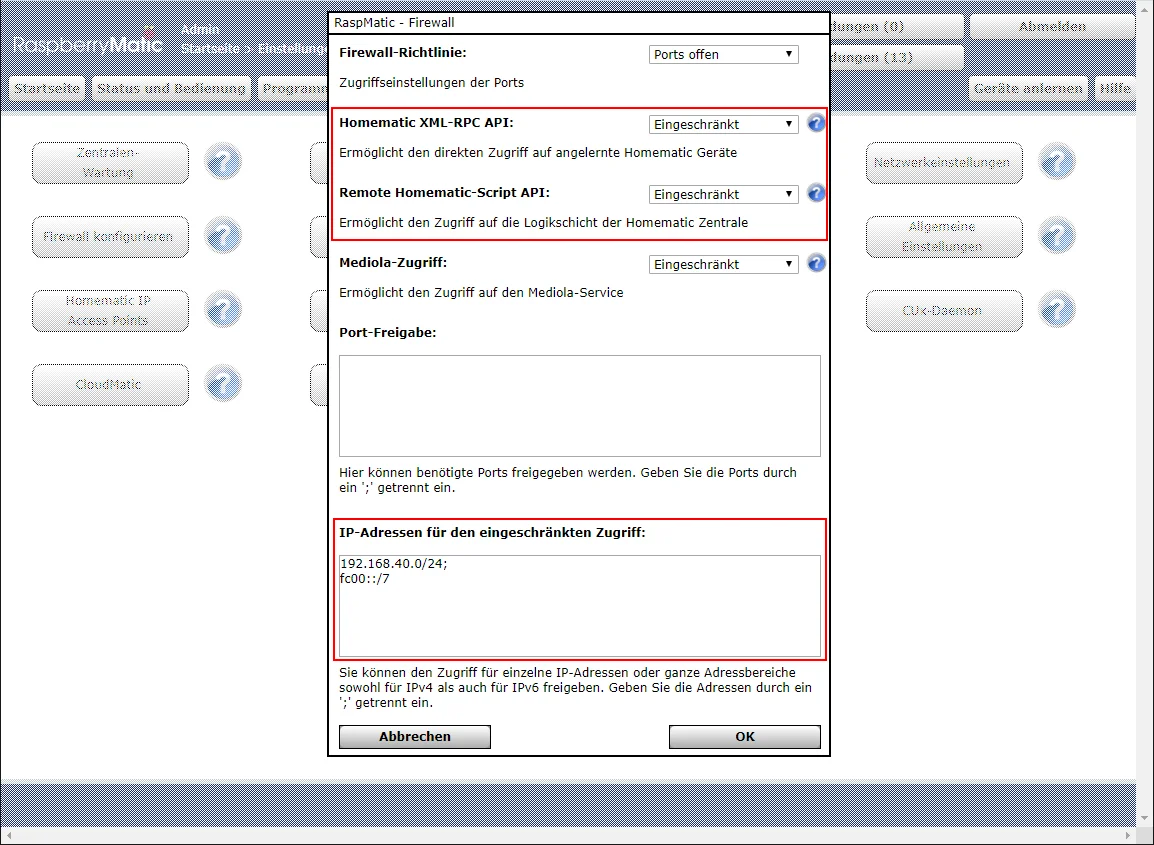
In the “Configure Firewall” submenu, the entries “Homematic XML-RPC API” and “Remote Homematic-Script API” must be set to at least “Restricted.” Additionally, the “Firewall Policy” must either be set to “Ports open” or the following must be added to the port release:
2000;
2001;
2010;
8701;
9292;
In the “IP addresses for restricted access” section, you must also include your local network (or alternatively just the IP of the openHAB server).
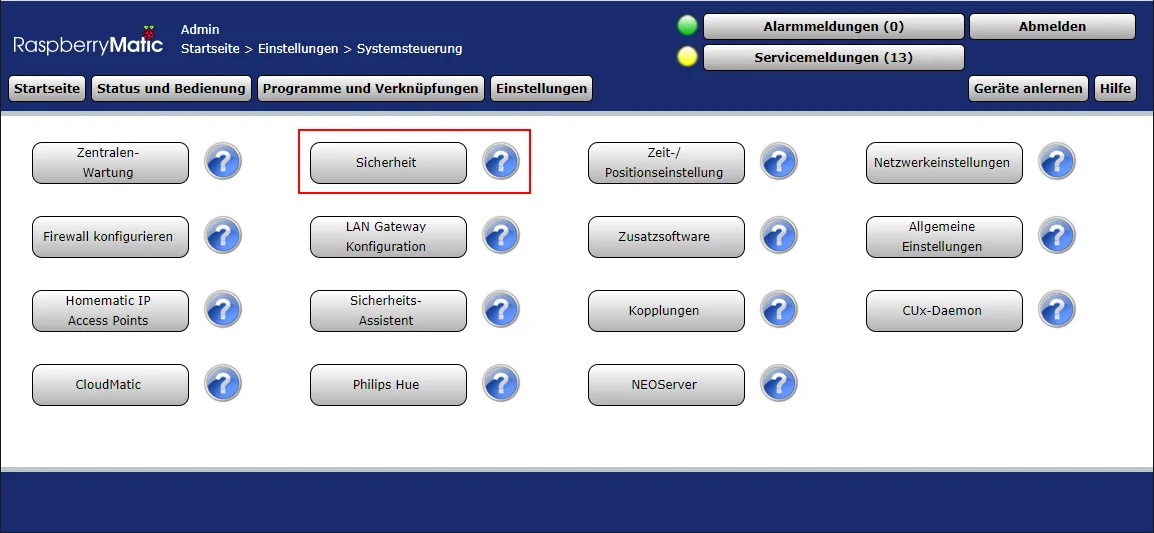
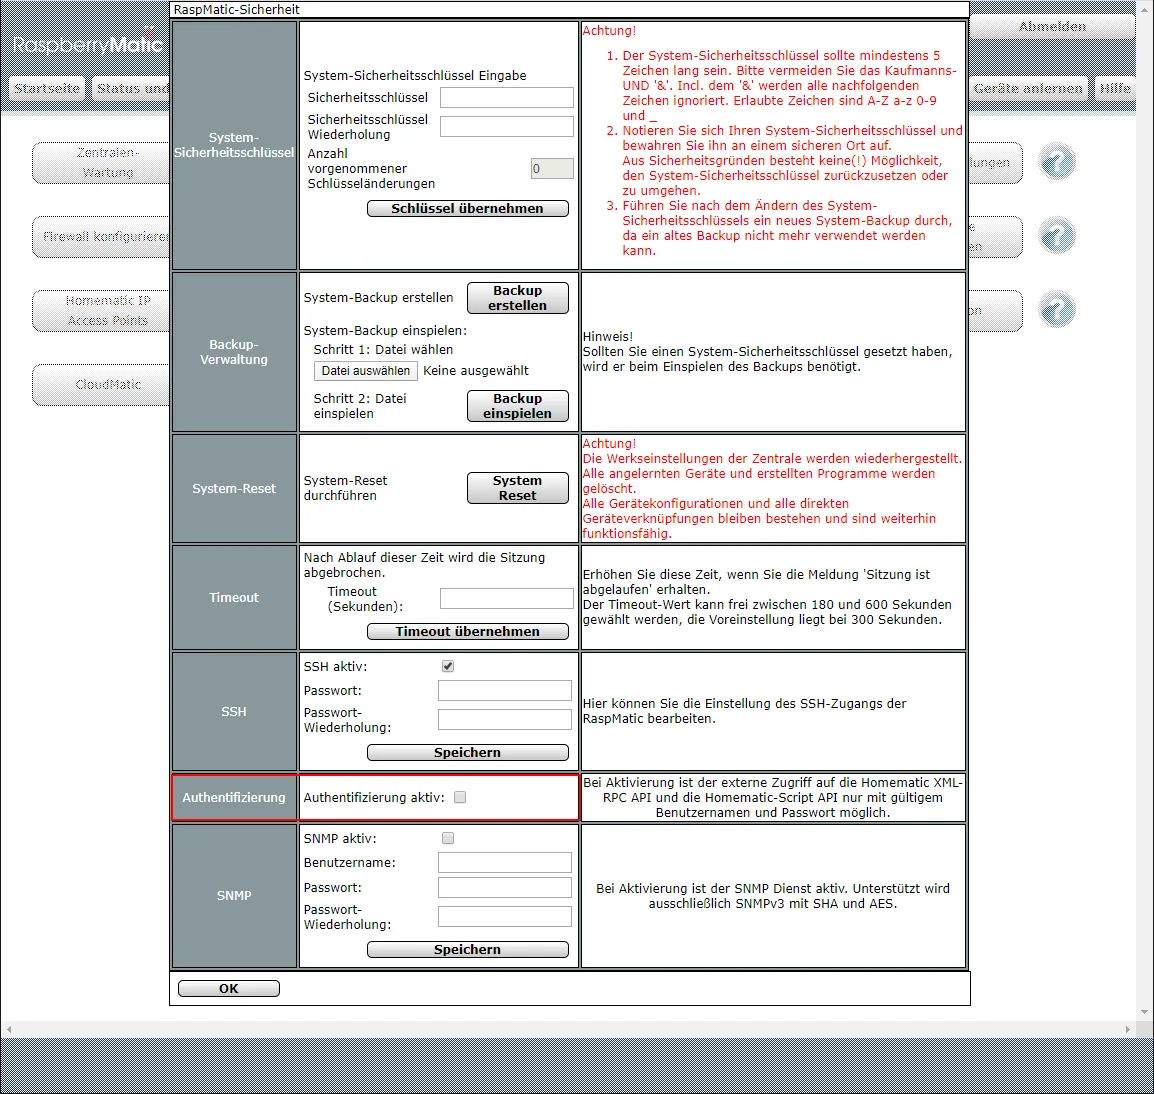
In the “Security” section, authentication must be disabled for the XML-RPC API (not supported by the openHAB binding):
That’s it for the CCU setup. Now let’s continue with openHAB.
2) Installing the Binding
The Homematic binding can be installed in the openHAB Paper UI (accessible in the standard configuration at http://openhab:8080/paperui/index.html#/extensions?tab=binding).
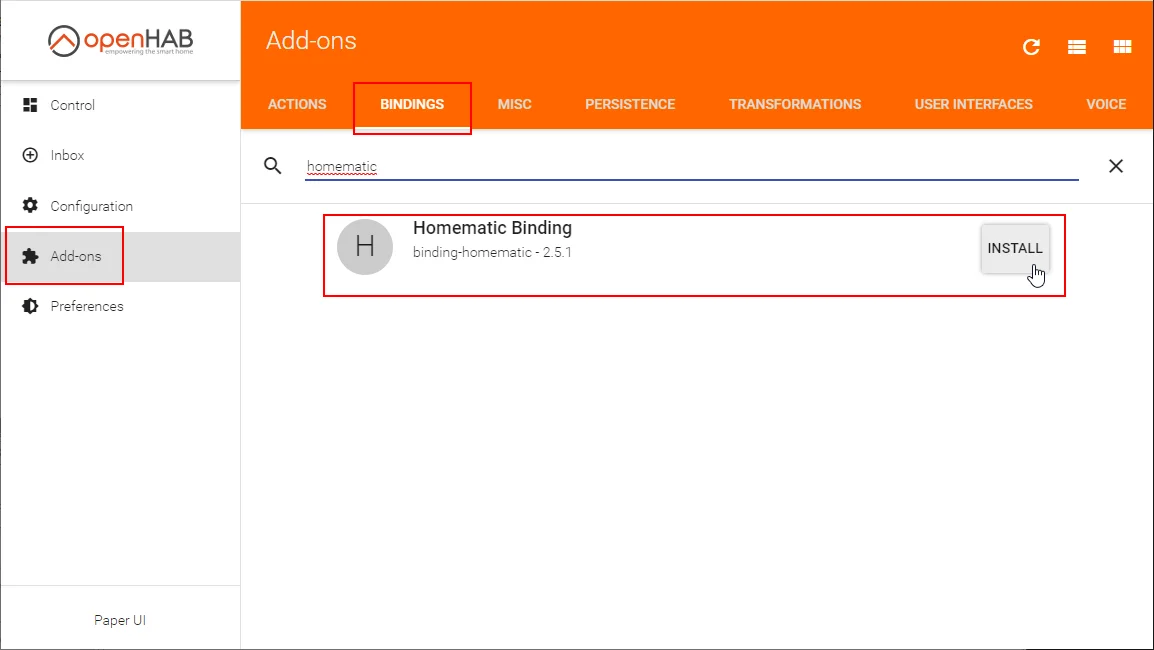
You’ll only see that the installation is complete after reloading the page; otherwise, the indicator just keeps spinning indefinitely.
If the installation was successful, you should now have a new entry in your Inbox for the Homematic central unit. Add it by clicking the blue checkmark.
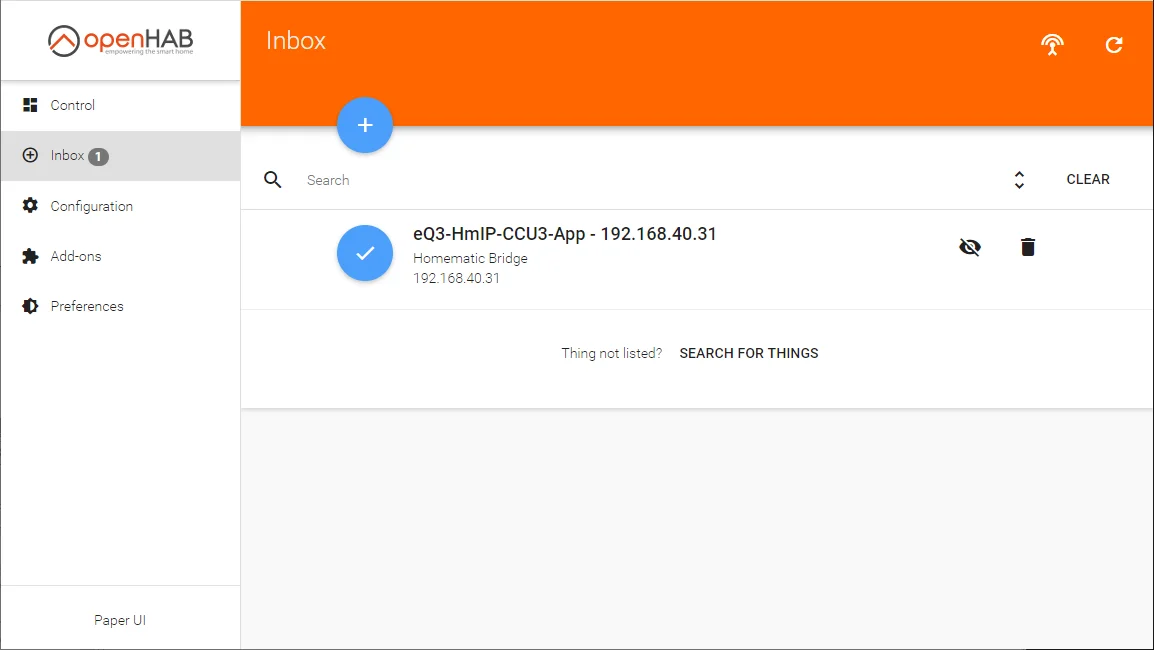
You can also give it a custom name. I named mine “Homematic CCU3.”

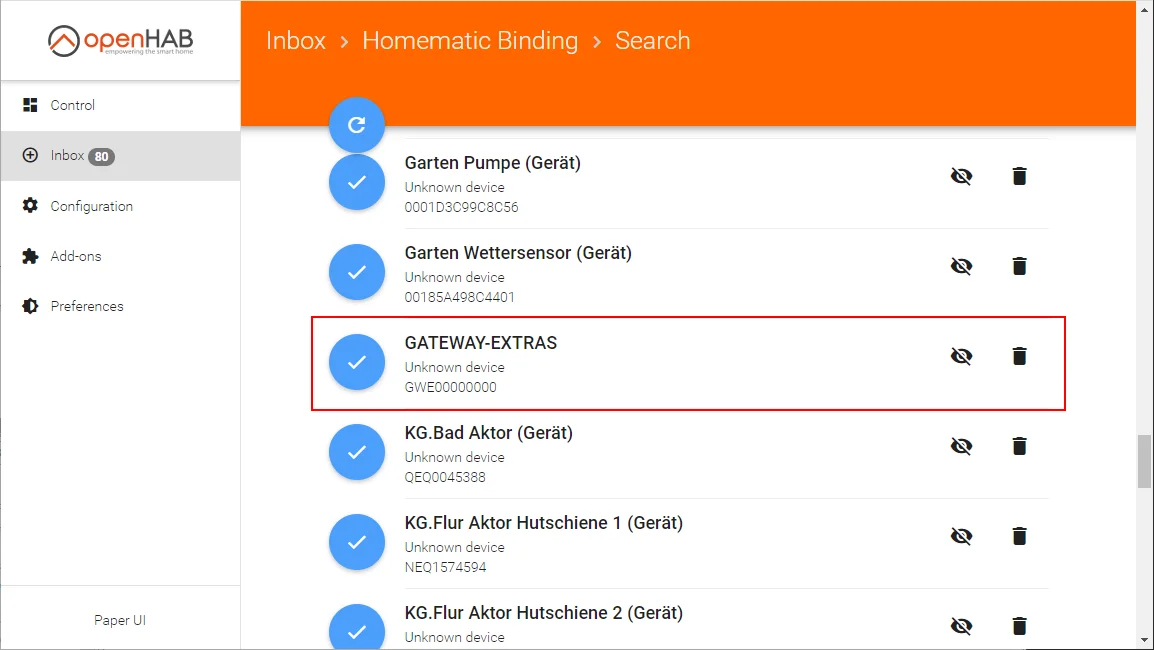
After adding it, your Inbox reloads and shortly displays all the devices you’ve configured in Homematic. There’s a special feature here: the device “GATEWAY-EXTRAS” is also displayed. If you want to access variables, programs, and other system parameters (e.g., the duty cycle) of Homematic from openHAB, you should add this device as well.
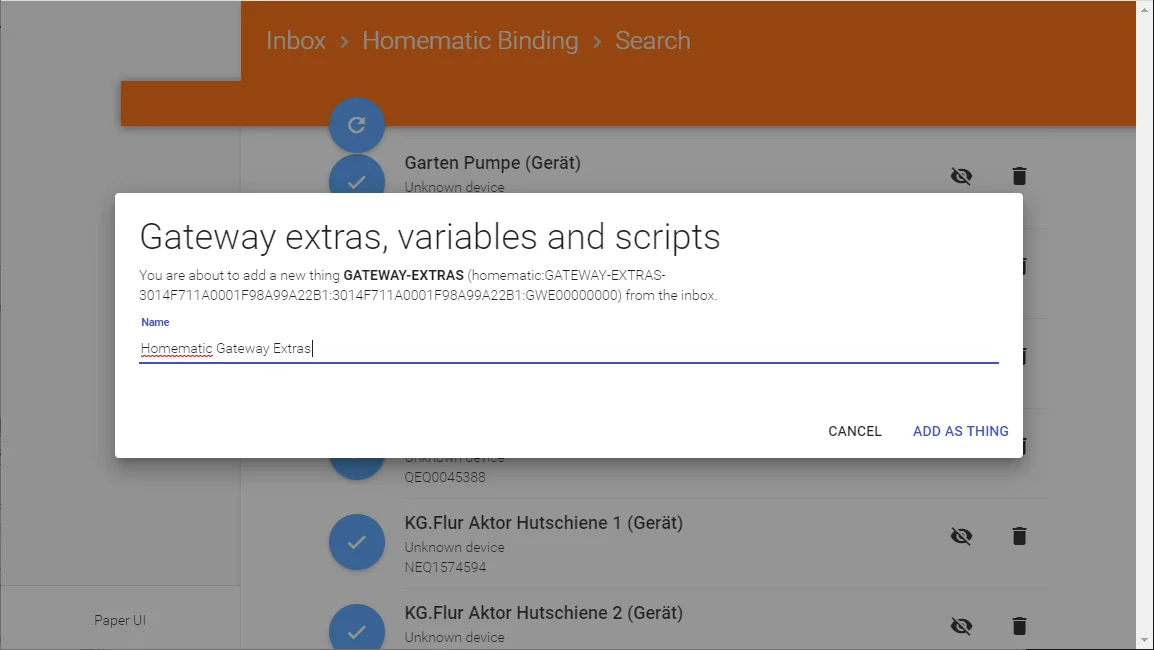
Side note: If you create new variables or delete existing ones in Homematic after this point, they will not be automatically synchronized to openHAB. The solution is to delete the “Gateway Extras” thing and add it again from the Inbox.
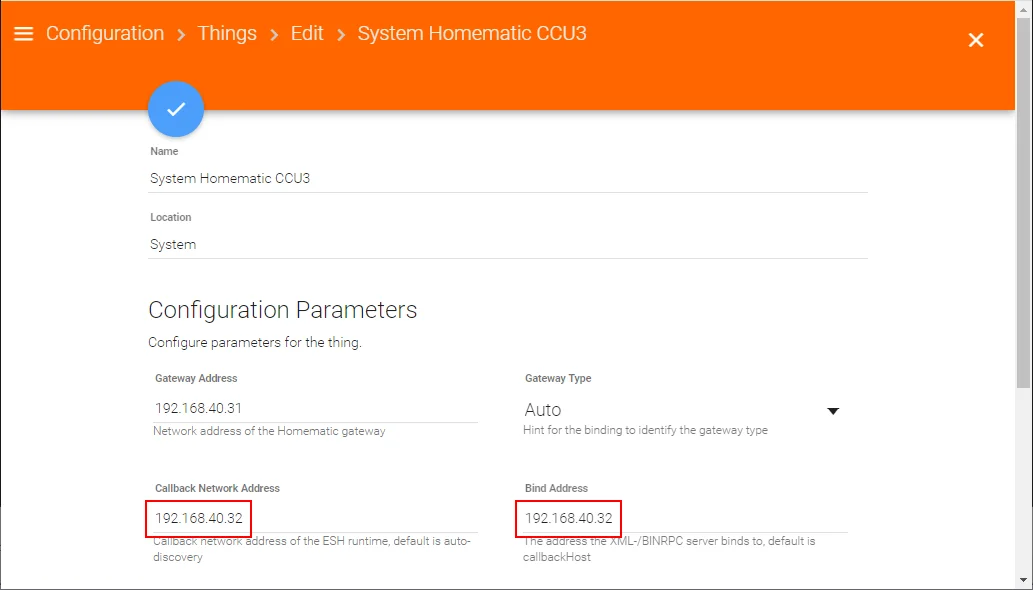
Finally, I recommend setting the network addresses in the properties of the Homematic CCU3 thing to the fixed IP address of the Raspberry Pi. Without this setting, I always got the “Jetty failed” message after an openHAB restart.
For this to work, the IP address must be static or at least always get the same address via DHCP. I explained how to set this up with a Fritzbox in my openHAB installation article.
Conclusion
That’s it! openHAB is now connected to Homematic, and the devices configured there can also be used from openHAB.
I’d love to hear your comments on whether this article helped you. Also, feel free to write if you have questions or if something remained unclear. Or if you were able to implement exciting automation projects based on this setup 🙂
No Comments? No Problem.
This blog doesn't support comments, but your thoughts and questions are always welcome. Reach out through the contact details at the bottom of the page.
Support Me
If you found this page helpful and want to say thanks, you can support me here.