Controlling Maico PushPull 45 RC Ventilation Units with Homematic
Eiko WagenknechtThis article aims to show how to control Maico PushPull 45 RC ventilation units with a Homematic system, enabling operation through Homematic-learned switches and taking advantage of the smart home system’s full functionality.
Table of Contents
- Required Materials/Licenses
- Prerequisites
- 1) Connecting the EnOcean Wireless Module
- 2) Installing CUxD
- 3) Determining the Serial Number of the EnOcean USB Gateway
- 4) Setting Up Switches in CUxD
- 5) Pairing the Devices with the CCU
- 6) Control via CCU Program
- 7) Control via Variables
- Conclusion
Required Materials/Licenses
- Ventilation units Maico PushPull 45 RC (e.g., from flachkanalmarkt.de approx. €520)
- Homematic CCU3 (e.g., from amazon.de (paid link), approx. €140)
- EnOcean USB 300 Gateway (e.g., from amazon.de (paid link), approx. €45)
- CUxD EnOcean License (from piotek.de, approx. €40)
Prerequisites
I assume that you have already installed and configured a Homematic CCU3 (alternatively CCU2 or Raspberrymatic).
1) Connecting the EnOcean Wireless Module
The EnOcean USB 300 Gateway must be connected to the Homematic central unit. This works simply via USB, but it’s important to choose a location that provides good connectivity between the USB stick and the Maico PushPull devices configured as masters. In my experience, the wireless range of the USB Gateway is rather limited, so you may need to use a longer USB extension cable to find a better position.
2) Installing CUxD
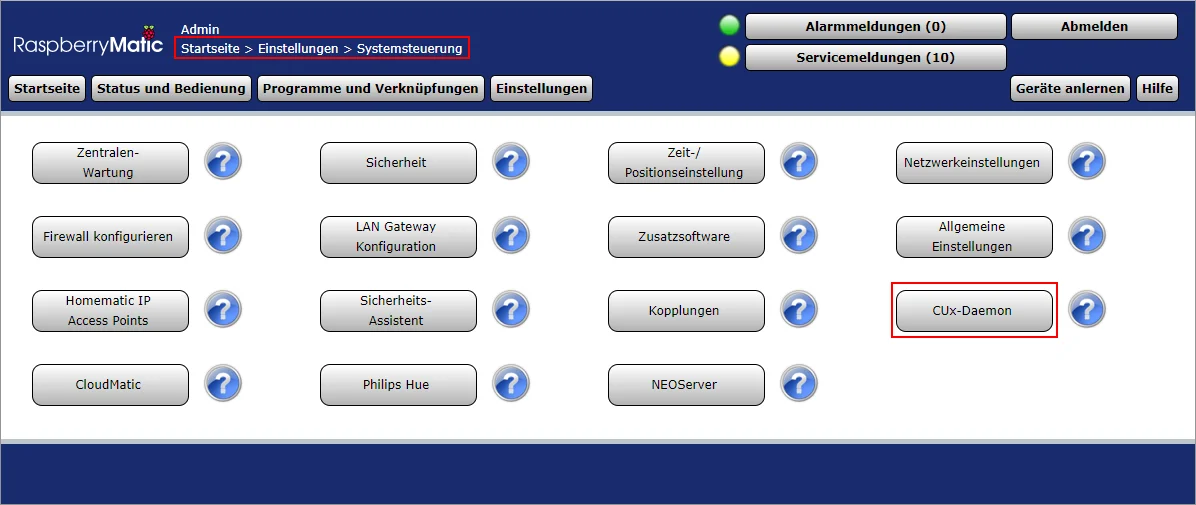
First, CUxD must be installed. At the time of writing this article, I’m using the current version 2.3.3. You can find the required downloads and a very detailed guide in the Homematic Forum. Chapter 2 in the cuxd_2.3.pdf is relevant for installation. You can access the interface afterwards at:
3) Determining the Serial Number of the EnOcean USB Gateway
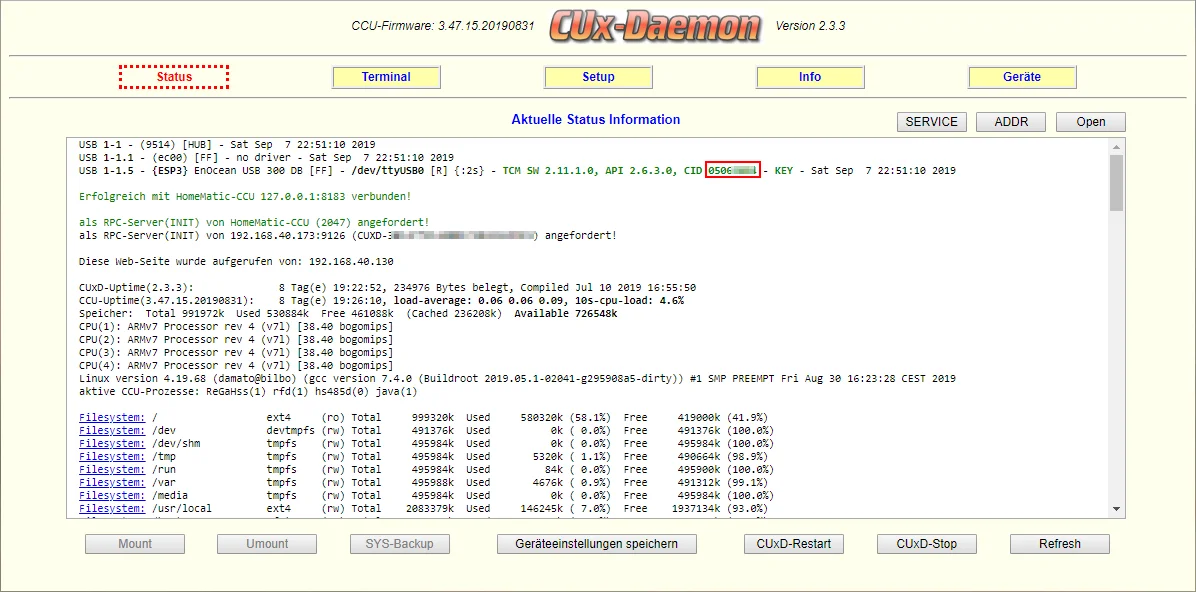
In the CUxD interface, the EnOcean USB 300 Gateway appears in one of the first lines of the “Status” area once it’s connected to the CCU. The serial number is shown after CID. You’ll need this to activate the license (see purchase link above).
4) Setting Up Switches in CUxD
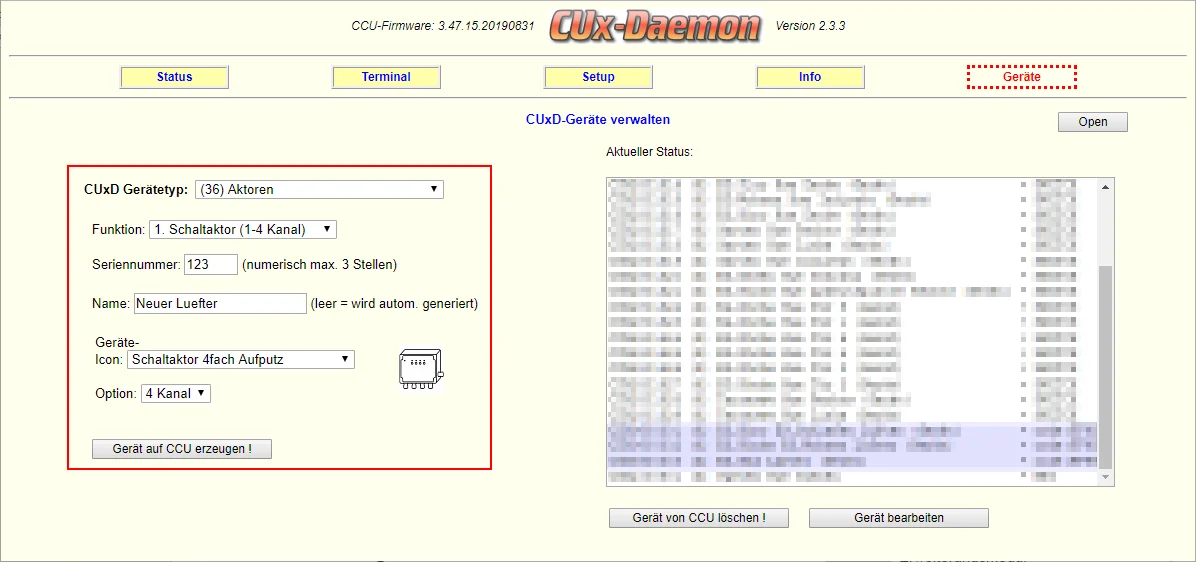
Now we need a virtual replacement for the expensive original Maico switch. To do this, we set up a device in the CUxD interface as follows:
- Device type: (36) Actors
- Function: 1. Switch actor (1-4 channel)
- Serial number: As desired (cannot be changed later)
- Name: As desired (can be changed later)
- Device icon: 4-fold switch actor surface-mounted
- Option: 4 Channel
Confirm by clicking “Create device on CCU!”
After the device has been created, it appears highlighted in yellow in the list on the right side:
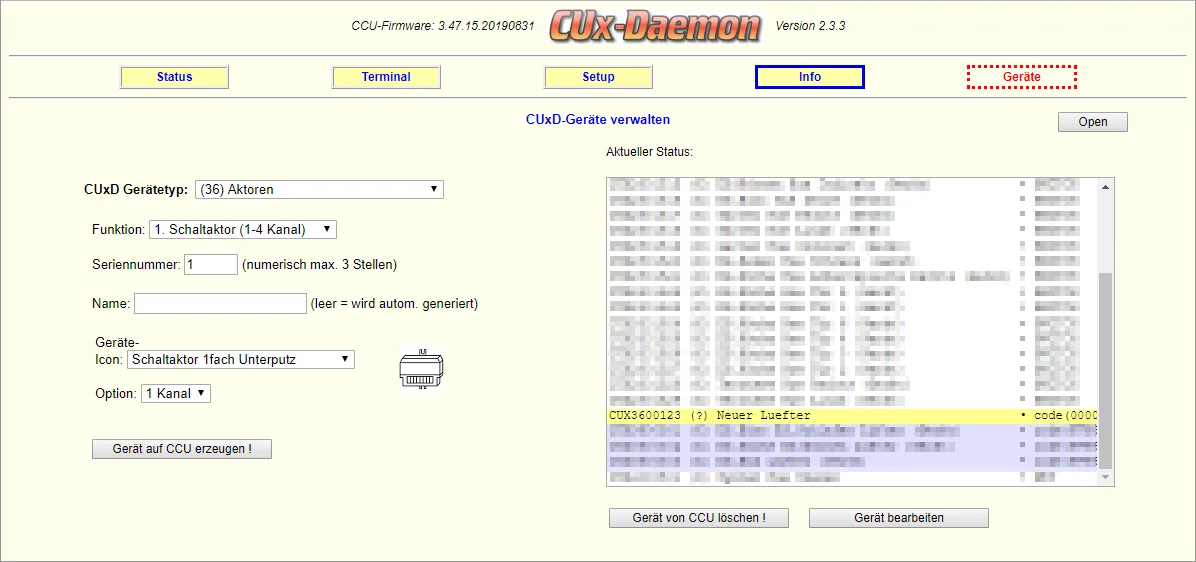
Additionally, it appears in the Homematic inbox:
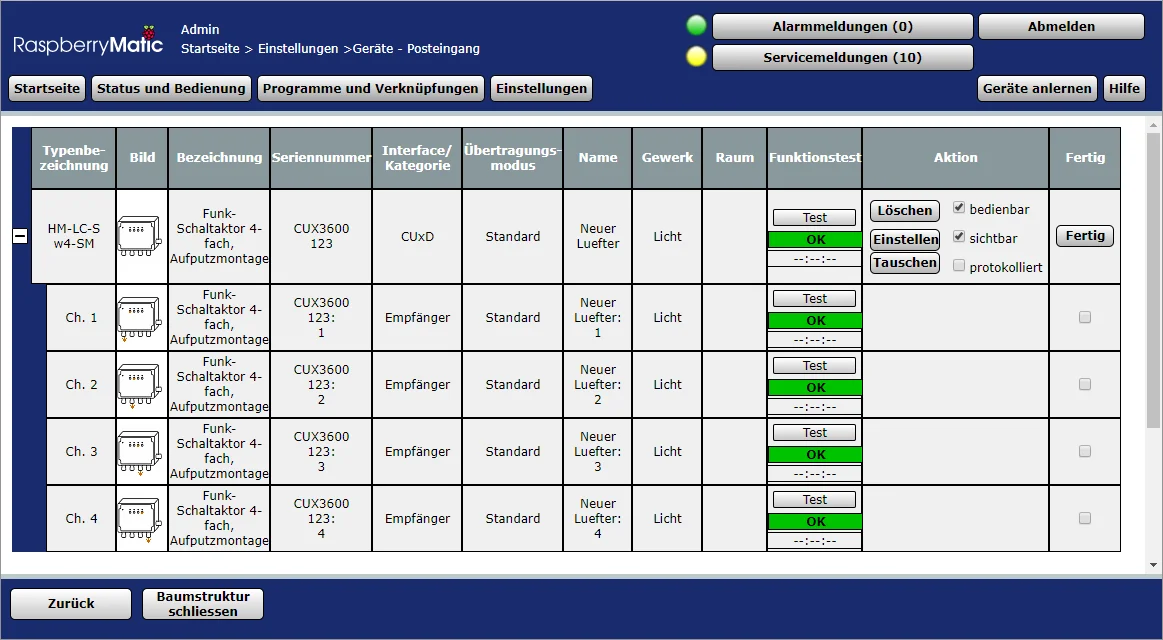
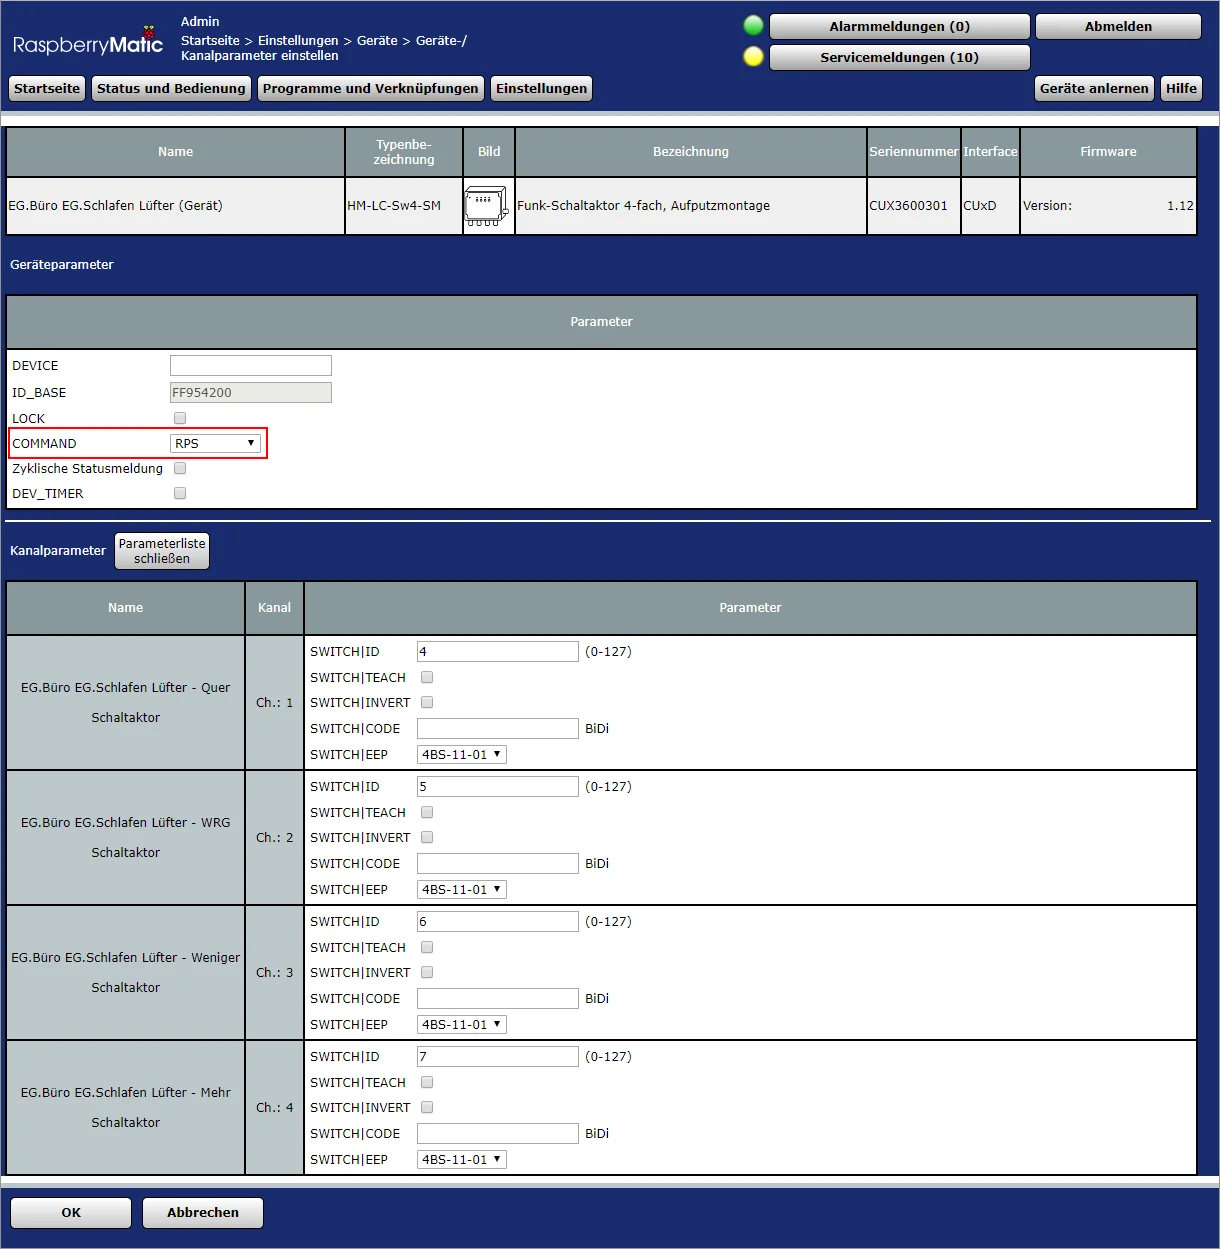
Under “Set,” “COMMAND” now needs to be changed to RPS. The other values can remain at their default settings. Don’t change the SWITCH|IDs, as these must be unique on your CCU and are already appropriately assigned when creating the device.
This device creation process needs to be performed for each ventilation unit pair (Master/Slave). In my case, I did this twice (Ground Floor Office - Ground Floor Bedroom and Ground Floor Kitchen - Ground Floor Living Room).
5) Pairing the Devices with the CCU
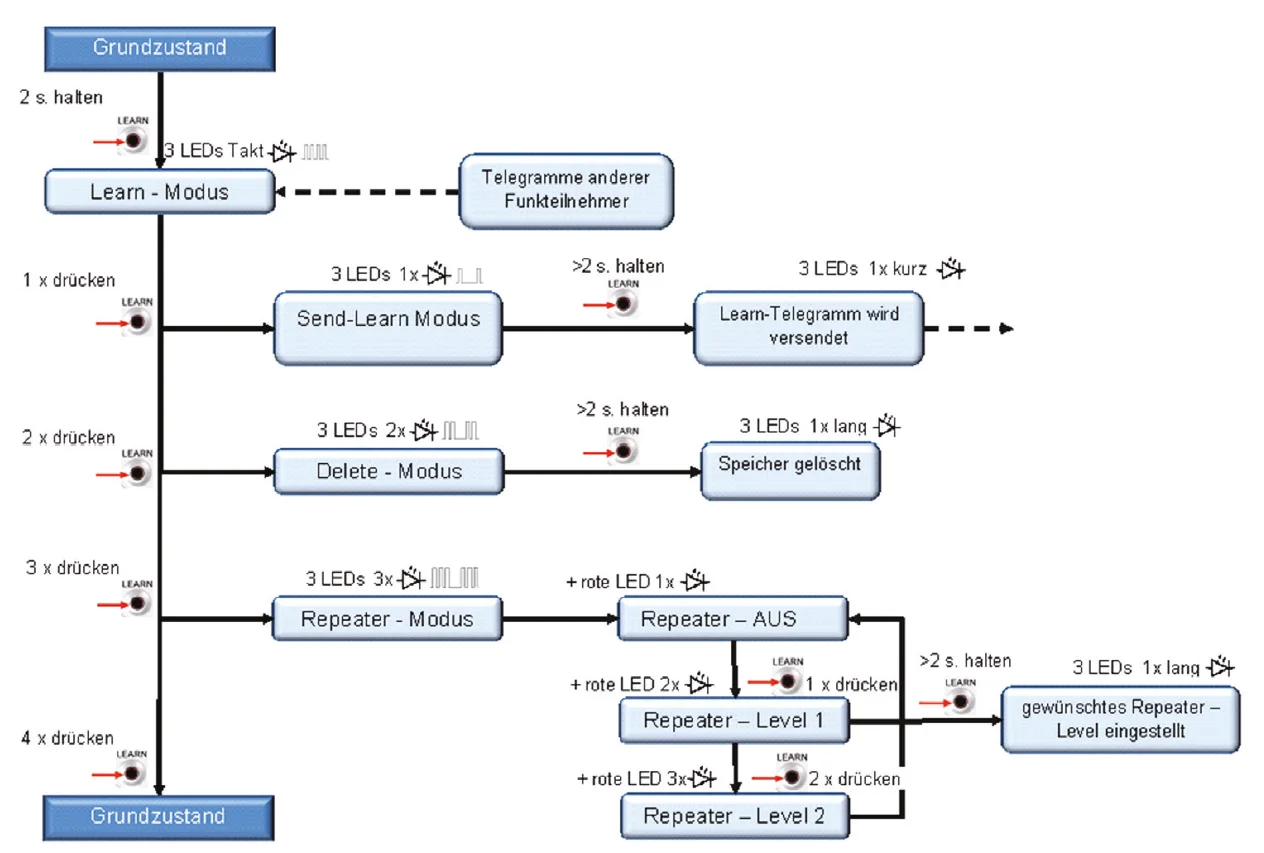
The next step is to pair the ventilation units with the CCU. A prerequisite is that the devices are already paired with each other (Master/Slave). The Maico manual describes in detail how to do this. Next, they need to be paired with the newly created virtual switch. This works as described in the manual: press the LEARN button for 2 seconds and the process begins.
Now, in the channel parameters for the first channel, the checkbox for SWITCH|TEACH must be checked (see screenshot above) and saved. After that, the button must be activated, which can be done via the WebUI:
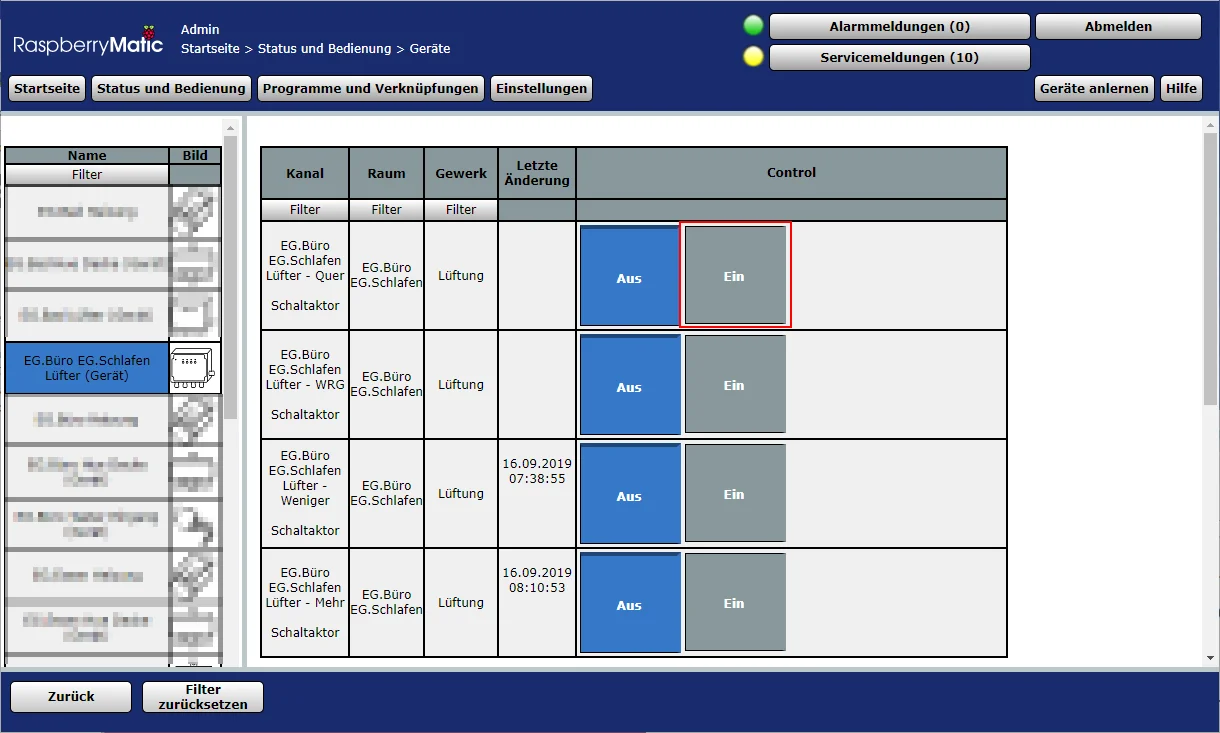
As soon as you press the button, the ventilation unit should stop flashing, indicating it has been successfully paired.
Important: Each channel now corresponds to a button on the original control element:
Channel 1 - Top Right | Short | ON, increase ventilation level
Channel 1 - Top Right | Long | Boost ventilation. Level 5 for 30 min. (factory setting)
Channel 2 - Bottom Right | Short | Decrease ventilation level, OFF
Channel 2 - Bottom Right | Long | Sleep function. OFF for 60 min. (factory setting)
Channel 3 - Top Left | Short | HRC ventilation. Ventilation with heat recovery
Channel 3 - Top Left | Long | Auto mode HRC ventilation. With connected sensor
Channel 4 - Bottom Left | Short | Cross ventilation. Ventilation without heat recovery
Channel 4 - Bottom Left | Long | Auto mode cross ventilation. With connected sensor
As you can see, each channel has two functions assigned: the short and long button press. In practice, this works by pressing “On” for Channel 1 and then 0.5s later pressing “Off,” which simulates a short button press. If you wait 2.5s between presses, it results in a long button press. This is still rather impractical for direct operation, so we’ll create a program to help with this.
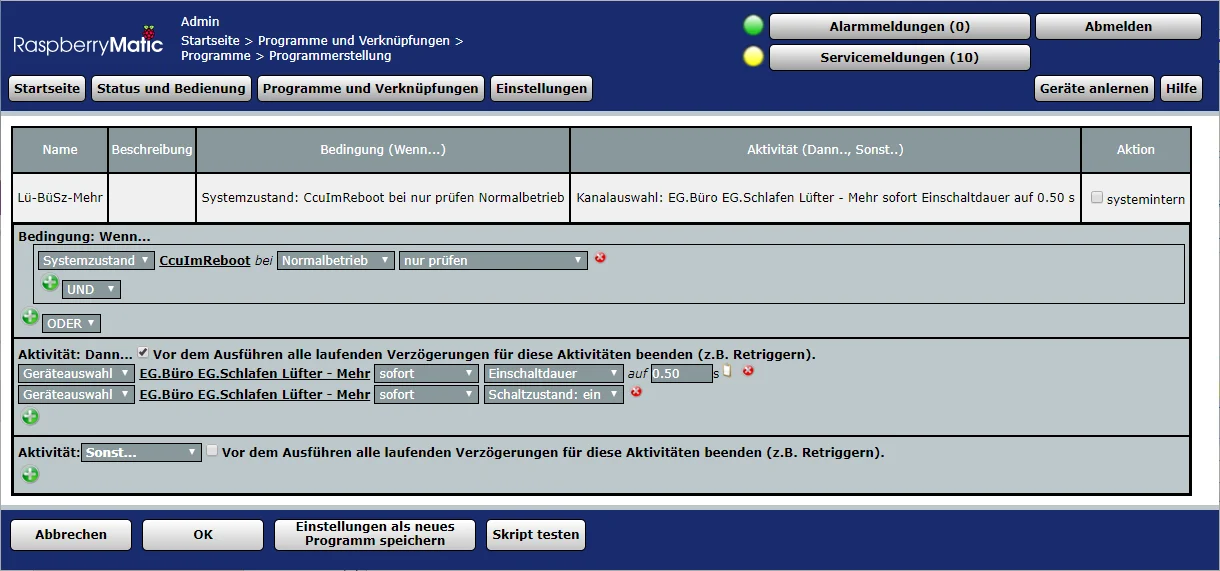
6) Control via CCU Program
For each functionality you need, you can create a corresponding program under “Programs and Links” -> “Programs & Central Links.” Since I exclusively use the ventilation level control, this results in two programs per ventilation unit pair:
- Ventilation up
- Ventilation down
These look as follows:
It can also be directly assigned to a button:
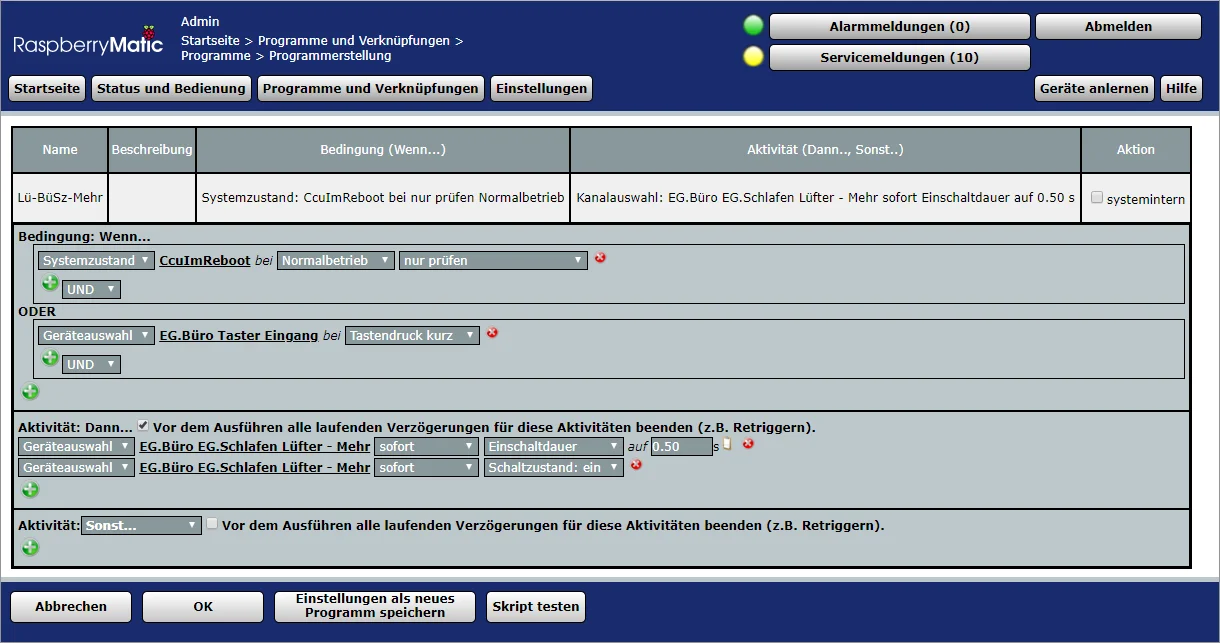
The full functionality of the CCU can be used to automate the control.
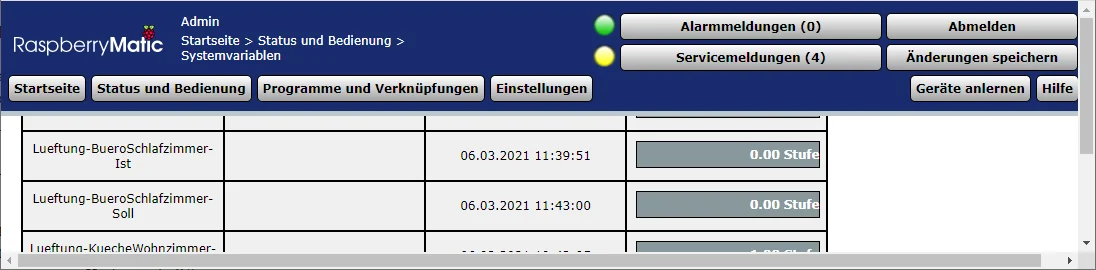
7) Control via Variables
So far, we have the ability to turn the ventilation “up” and “down.” To make this more convenient, it would be desirable to see the current level and be able to directly select the desired level. For this, we need another program and a few variables. The variables contain the current and target levels:
And the program evaluates changes in the level to control the ventilation system:

Content of the script blocks (from top to bottom):
var curLevel = dom.GetObject("Lueftung-BueroSchlafzimmer-Ist").Value();
var setLevel = dom.GetObject("Lueftung-BueroSchlafzimmer-Soll").Value();
WriteLine("Aktuelle Stufe: " + curLevel);
WriteLine("Ziel Stufe: " + setLevel);
var newLevel = 0;
if (setLevel == curLevel) {
  WriteLine("Ziel Stufe bereits erreicht");
} elseif (setLevel > curLevel) {
  newLevel = curLevel + 1;
  WriteLine("Erhöhe Stufe auf " + newLevel);
  dom.GetObject("Lueftung_BueroSchlafzimmer_Mehr").ProgramExecute();
} else {
  newLevel = curLevel - 1;
  WriteLine("Senke Stufe auf " + newLevel);
  dom.GetObject("Lueftung_BueroSchlafzimmer_Weniger").ProgramExecute();
}
var curLevel = dom.GetObject("Lueftung-BueroSchlafzimmer-Ist").Value();
var setLevel = dom.GetObject("Lueftung-BueroSchlafzimmer-Soll").Value();
WriteLine("Aktuelle Stufe: " + curLevel);
WriteLine("Ziel Stufe: " + setLevel);
var newLevel = 0;
if (curLevel == 5) {
WriteLine("Erhöhe Wert zur Kalibrierung nochmals");
! dom.GetObject("Lueftung_BueroSchlafzimmer_Mehr").ProgramExecute();
} elseif (curLevel == 0) {
WriteLine("Senke Wert zur Kalibrierung nochmals");
! dom.GetObject("Lueftung_BueroSchlafzimmer_Weniger").ProgramExecute();
}Please be careful with the program names “Mehr” (More) and “Weniger” (Less), as this part of the guide was added later after renaming the old programs. Adjust accordingly if needed.
Conclusion
This is, of course, just the first step to make the fans accessible to Homematic. From here, you could, for example, control the fan level based on a Netatmo CO² sensor.
Benjamin pointed out that an Eltaco FRP70 (paid link) works wonderfully as a repeater to improve the rather limited range of the Maico devices, allowing them to be operated across two floors, for example.
This is my first article in the field of home technology. Please leave comments if you like the format or if you have questions or if anything remained unclear.
No Comments? No Problem.
This blog doesn't support comments, but your thoughts and questions are always welcome. Reach out through the contact details at the bottom of the page.
Support Me
If you found this page helpful and want to say thanks, you can support me here.