Controlling Philips Hue Lamps with Homematic
Eiko WagenknechtThe goal of this article is to integrate a newly installed Philips Hue lamp with Homematic, so it can be controlled via switches and/or programs. The setup is designed to be compatible with the pocketControl app.
Table of Contents
- Required Materials
- Prerequisites
- 1) Installing CUxD
- 2) Installing the Philips Hue Addon
- 3) Determining Lamp Parameters
- 4) Setting Up Switches in CUxD
- 5) Controlling Hue via CCU
- Conclusion
Required Materials
- Philips Hue lamp (e.g., Hue Lightstrip on amazon.de (affiliate link), approx. €55)
- Homematic CCU3 (e.g., on amazon.de (affiliate link), approx. €140)
- Optional: Homematic switch (e.g., wireless wall switch on amazon.de (affiliate link), approx. €39)
Prerequisites
I assume you have already installed and configured a Homematic CCU3 (alternatively CCU2 or Raspberrymatic). The Philips Hue Bridge should also already be set up.
1) Installing CUxD
If you haven’t done so already, you need to install CUxD first. At the time of writing this blog post, I’m using the current version 2.3.3. You can find the necessary downloads and a very detailed guide in the Homematic Forum. Chapter 2 in the cuxd_2.3.pdf is relevant for the installation. You can access the interface afterward at:
2) Installing the Philips Hue Addon
There are several ways to connect ELV Homematic to Philips Hue. In my opinion, the most important are the official integration built into Homematic and the Hue addon by j-a-n. I’ve tried both options and ultimately chose the addon because it offers several decisive advantages over the built-in solution.
It provides a very clear configuration interface, enables the control of scenes, and can synchronize the status of the Hue Bridge with Homematic. This means: When I turn off a light in the Hue app on my iPhone or via Google Assistant, Homematic knows shortly afterward that the light is off and can react appropriately when, for example, a light switch is pressed. All of this does not work with the official solution (unfortunately).
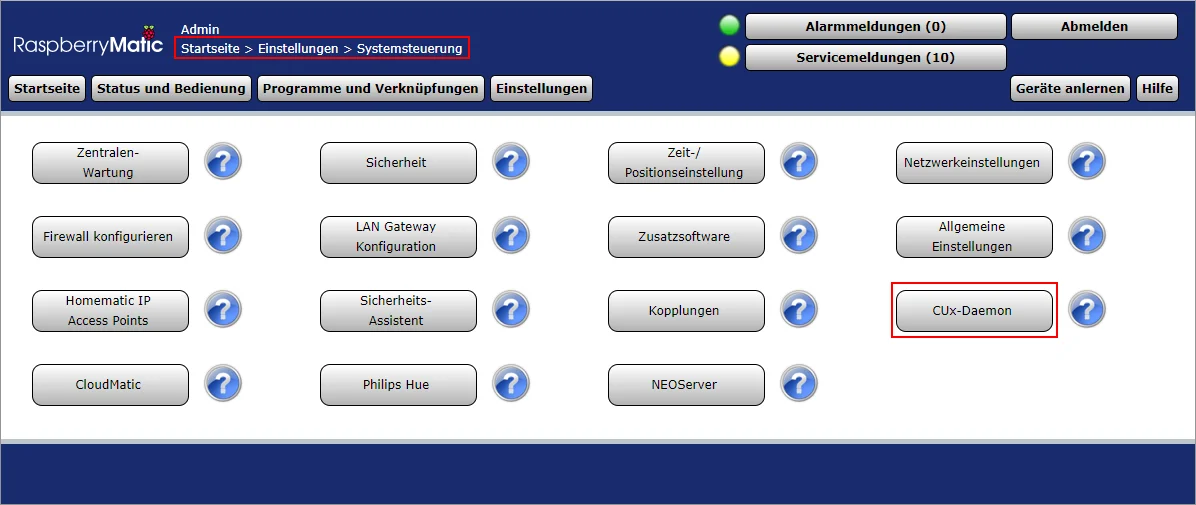
The installation of the addon is described on the addon page on GitHub. You can access the interface afterward at:
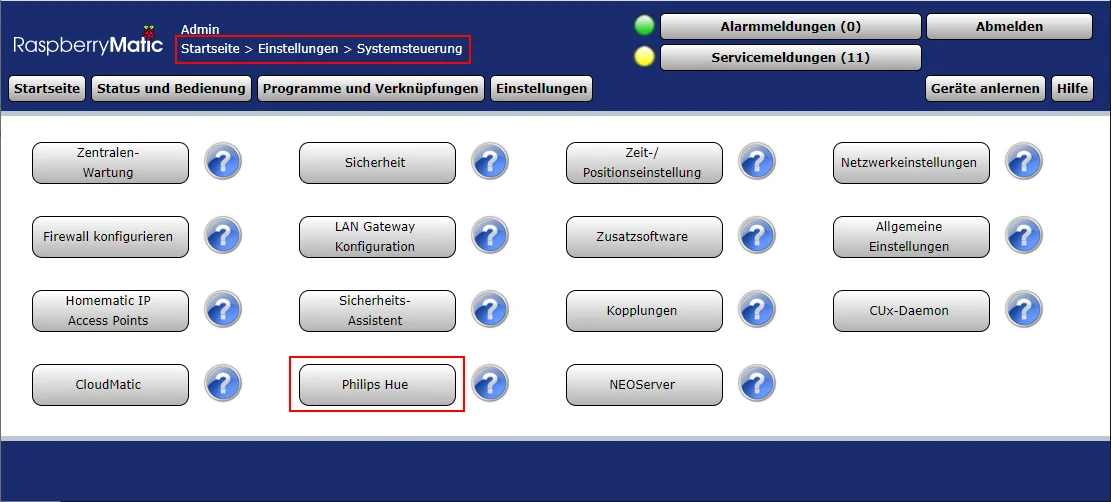
3) Determining Lamp Parameters
For the configuration, we’ll need the ID of the Philips Hue Bridge and the ID of the lamp on the bridge. These are shown to us in the web interface of the Hue addon:
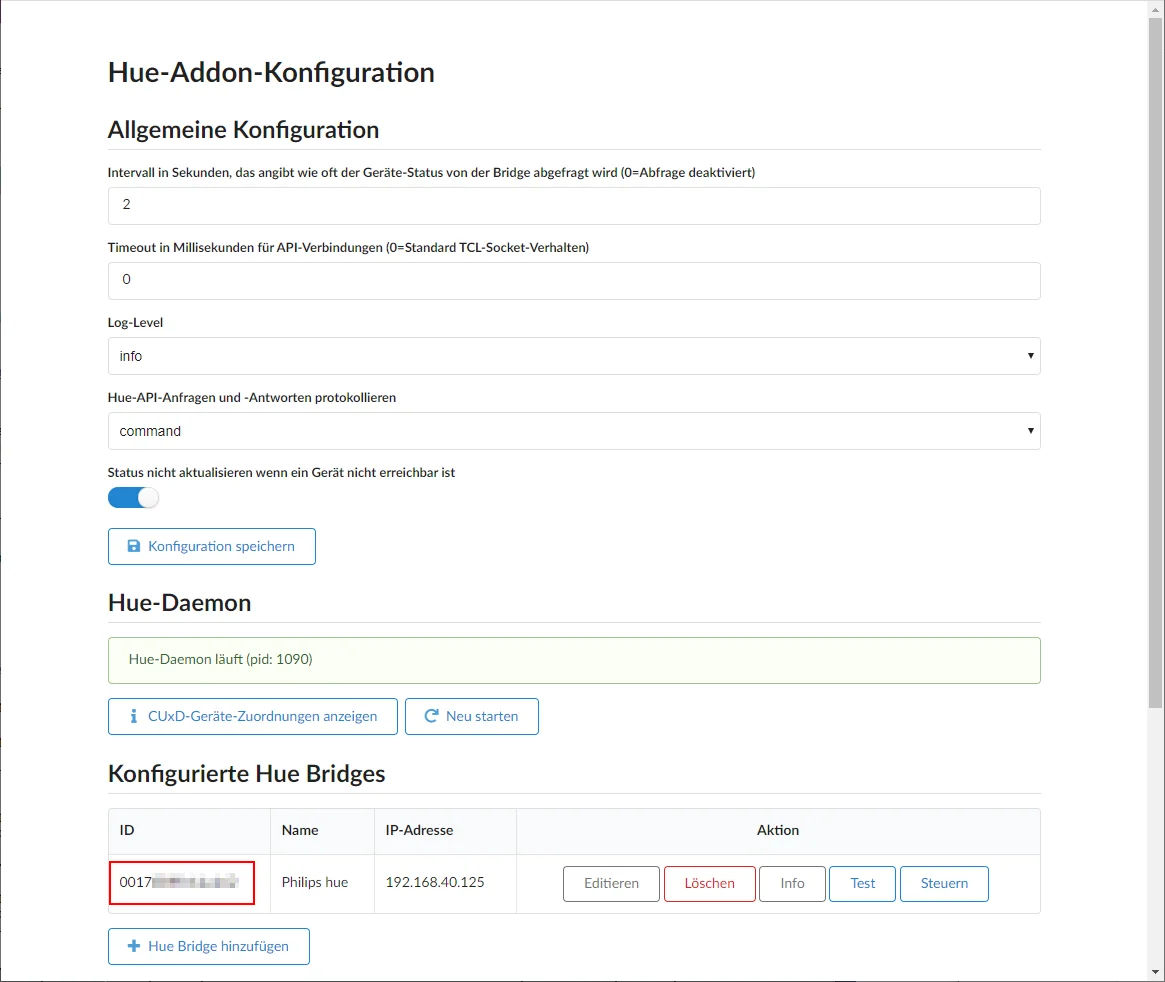
The ID of the Hue Bridge is marked. After pressing the Info button next to the bridge, a details window opens with information about all devices that are paired with the Hue Bridge. Here, I always look for the name of the newly paired lamp. The ID is then in the heading above it:
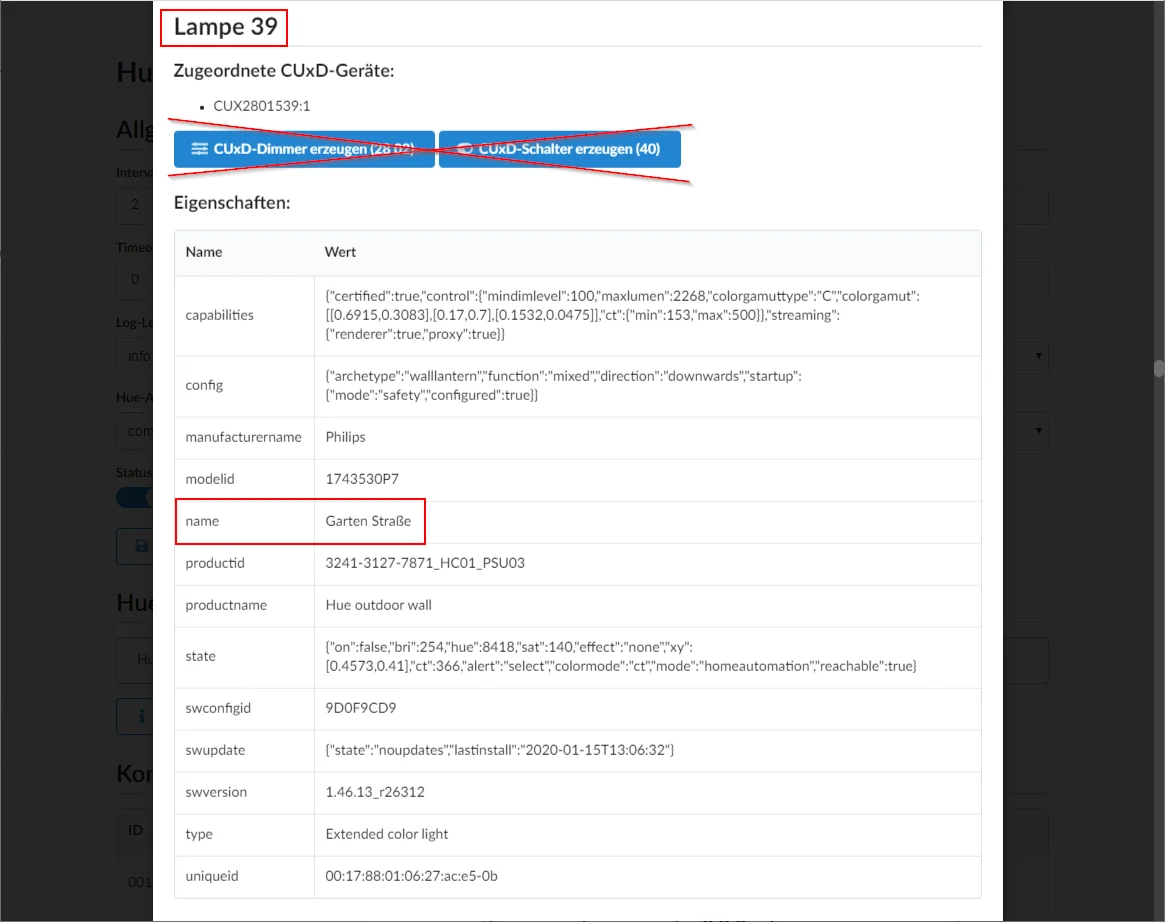
Note: At this point, there is an option to automatically create CUxD devices. I recommend not using this. During the automatic setup of a switch, a device of type “40” is created, but if you want to use pocketControl later (I highly recommend this app to every iPhone user!), you’ll encounter problems. So we continue manually:
4) Setting Up Switches in CUxD
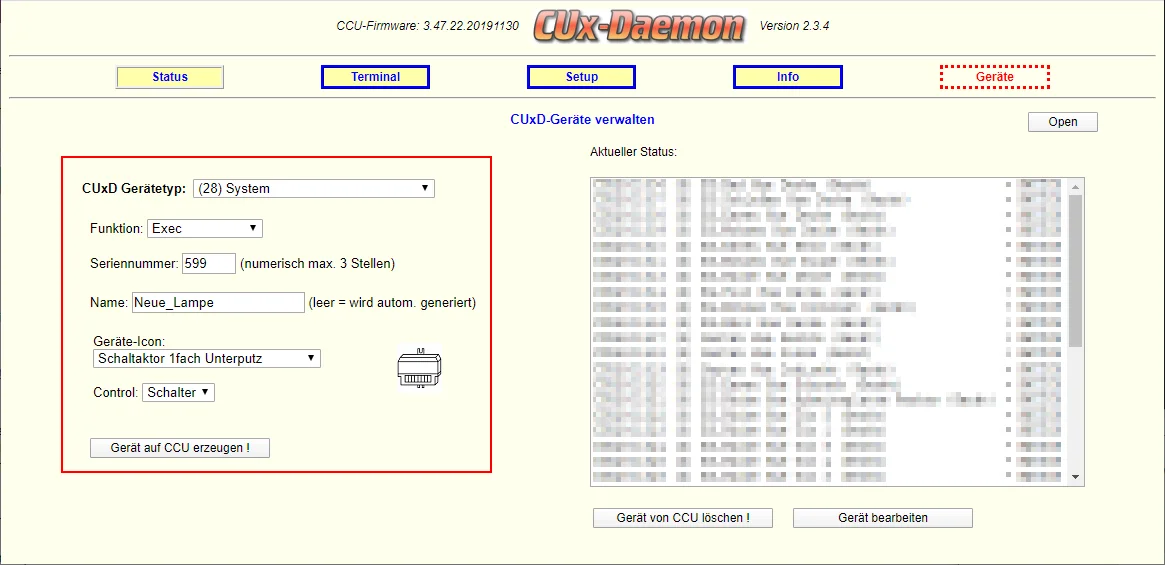
Now we need a virtual switch that will represent the state of the Hue lamp in Homematic. We set this up in the CUxD interface as follows:
- Device type: (28) System
- Function: Exec
- Serial number: As desired (cannot be changed later, I use 500+ID of the lamp (see below), e.g., 599 for lamp 99)
- Name: As desired (will be changed in the next step)
- Device icon: 1-channel flush-mounted switch actuator
- Control: Switch
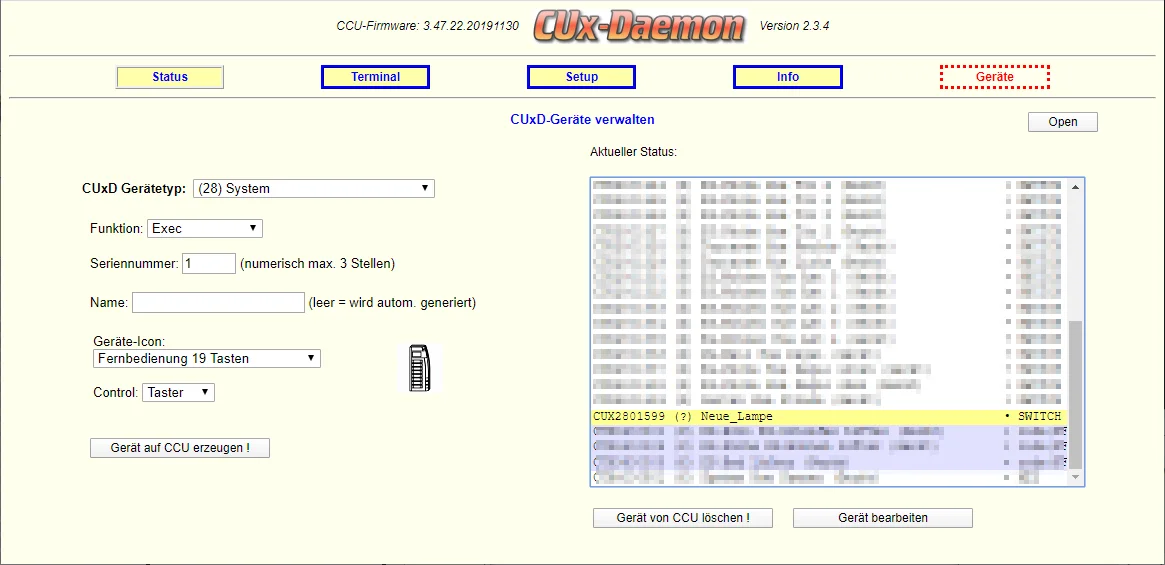
Confirm by clicking on “Create device on CCU!”.
After the device has been created, it appears highlighted in yellow in the list on the right side:
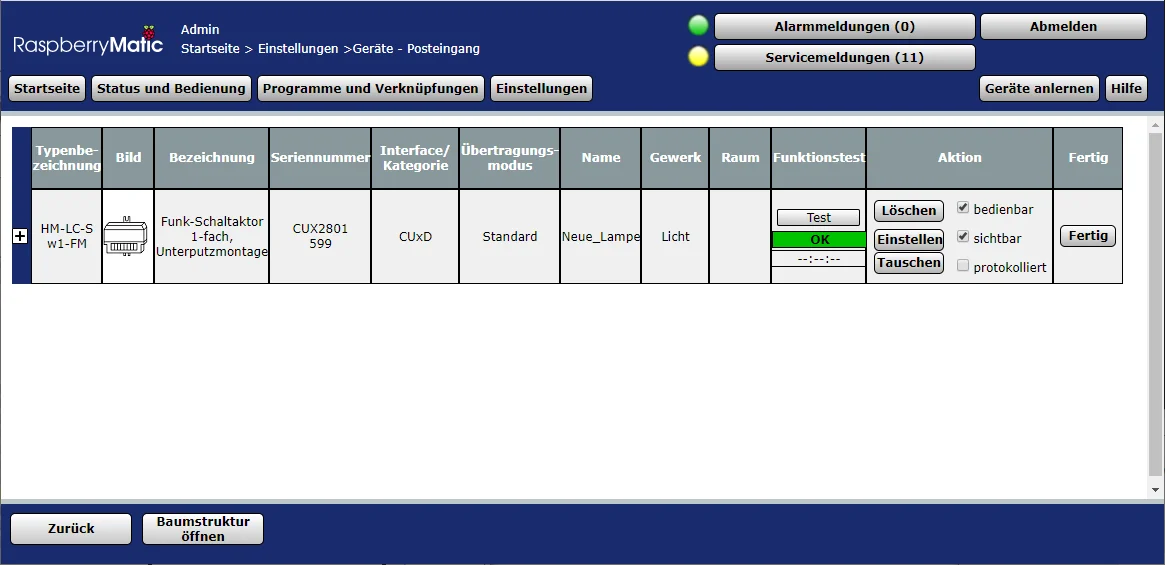
It also appears in the inbox of Homematic:
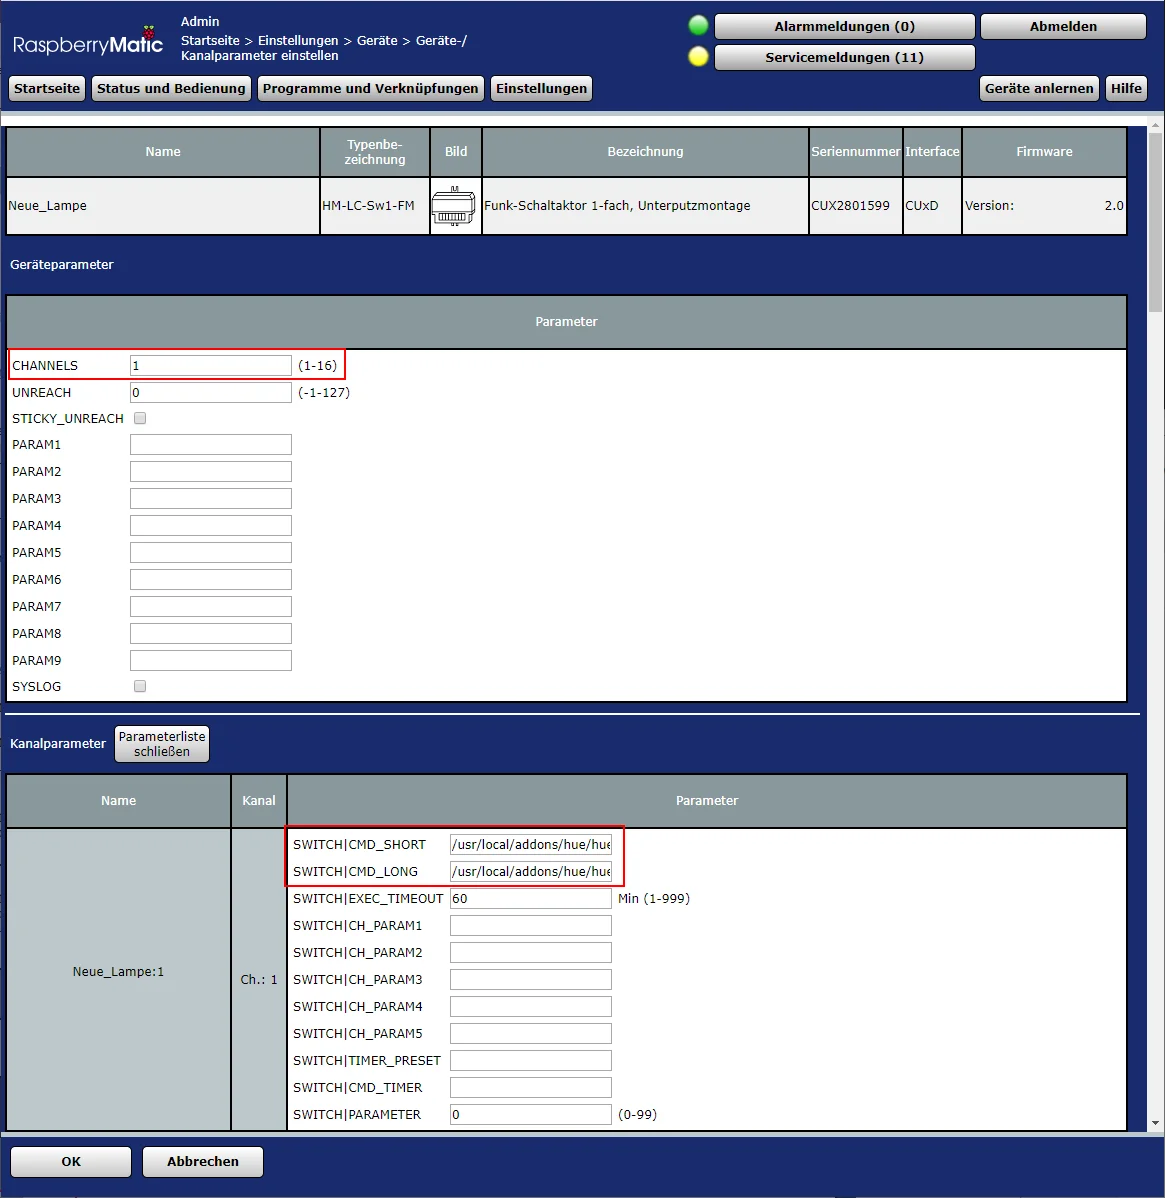
Under Settings, some reconfiguration is necessary. Specifically, “CHANNELS” must be set to 1. The other values of the device remain at the default. The actual configuration of the commands now takes place in the first channel.
“SWITCH|CMD_SHORT” is the command that is triggered when the switch is turned off, “SWITCH|CMD_LONG” is the command that is triggered when the switch is turned on.
The following should be entered here:
“SWITCH|CMD_SHORT”: /usr/local/addons/hue/hue.tcl <HUE_BRIDGE_ID> light <LAMP_ID> on:false
“SWITCH|CMD_LONG”: /usr/local/addons/hue/hue.tcl <HUE_BRIDGE_ID> light <LAMP_ID> on:true
For example: /usr/local/addons/hue/hue.tcl 0123456789 light 99 on:false
The new device can now be renamed accordingly (in my case, for example, “Garden Hue Street (Device)” for the device and “Garden Hue Street” for the lamp) and the trades and rooms can be configured.
5) Controlling Hue via CCU
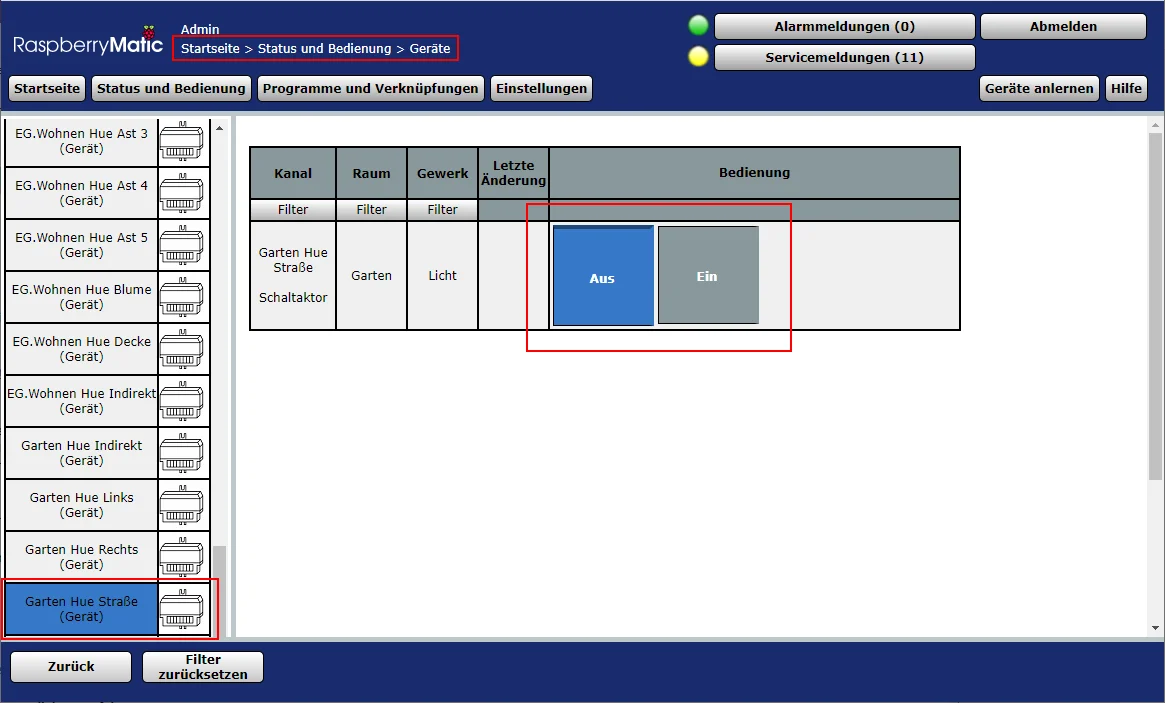
The Hue lamp can now be operated like a “normal” actuator in Homematic. The successful integration can be tested, for example, via the devices view:
Of course, it can also be assigned to a button via a program:
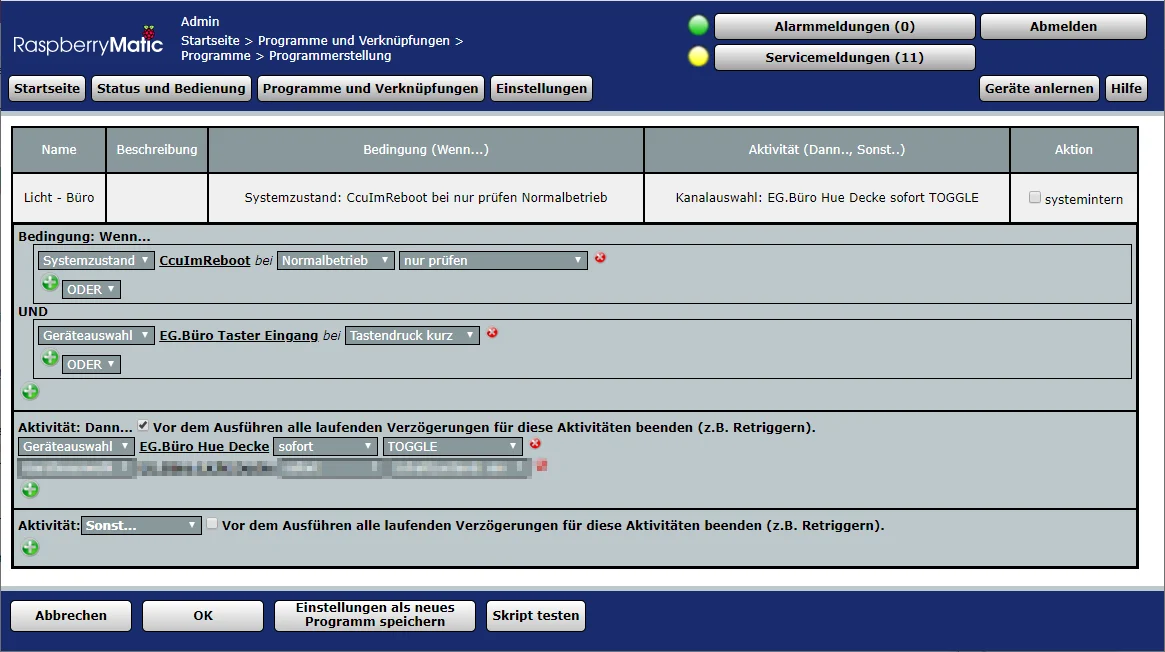
… or any functionality of the CCU can be used to automate the control from here.
Conclusion
This is, of course, just the first step to make Hue lamps accessible to Homematic. From here, all options of Homematic can be used to automate the lamps, integrate them into programs, switch them on a schedule, link them with sensors, make them light up during certain events, and much more.
I look forward to your comments on whether this article has been helpful to you. Feel free to write if you have questions or if something is still unclear. Or if you have been able to implement exciting further automation projects based on this!
No Comments? No Problem.
This blog doesn't support comments, but your thoughts and questions are always welcome. Reach out through the contact details at the bottom of the page.
Support Me
If you found this page helpful and want to say thanks, you can support me here.