How to set up a Raspberry Pi with automatic updates and SD card checks
Eiko WagenknechtFor many home automation projects, a Raspberry Pi is the perfect choice. It’s affordable, energy-efficient, and versatile.
This guide shows how to install the Raspberry Pi OS, set up automatic SD card checks, and enable automatic updates.
Table of Contents
Hardware
This should work with any recent Raspberry Pi model.
If you’re unsure which you need, as a general rule of thumb:
- For simple projects with no need for performance, the Raspberry Pi 3 can still be a good choice. It’s the most affordable and uses less power.
- For more demanding projects, I would recommend the Raspberry Pi 4 or 5. For example, my Home Assistant server previously ran mostly fine on a Raspberry Pi 4 Model B 4GB RAM, but I migrated to a Raspberry Pi 5 with 8GB of RAM recently and it’s quite a bit faster.
Sometimes Raspberry Pi models are out of stock or hard to get. In that case, rpilocator is a great resource to find a Raspberry Pi in your area.
In addition to the Raspberry Pi itself, you need:
- A microSD card (I recommend at least 32GB, but the needed size depends on what you want to do with the Raspberry Pi) Also I highly recommend investing a few bucks more for the Samsung Pro Endurance SD Card (128GB) (affiliate link) as too many other cards (including various SanDisk models) have failed on me repeatedly.
- A card reader (if your computer doesn’t have one built-in). I use the Transcend TS-RDF5K (affiliate link), but any card reader should work.
- A power supply. While this might seem trivial, it’s important to have a good power supply that can consistently deliver the needed power. Phone chargers seem like a good idea, but they have failed me in the past. You can try them, but if you run into issues, try a dedicated power supply like the official Raspberry Pi power supply for Pi 3 and 4 (affiliate link) or Pi 5 (affiliate link).
Raspberry Pi OS
The Raspberry Pi OS has evolved over the years, and with that, the name has changed as well. In the past, it was called Raspbian, but now it’s Raspberry Pi OS.
There are different versions available:
- Raspberry Pi OS with desktop
- Raspberry Pi OS with desktop and recommended software
- Raspberry Pi OS Lite
In addition, there are 32-bit and 64-bit versions of each available.
If you want to use the Raspberry for some home automation project, you probably want a headless setup (no monitor, keyboard, or mouse). For this, I recommend the Lite version as it doesn’t come with any desktop environment that wouldn’t be used anyway. Unless you have a specific reason to use the 32-bit version (such as running some legacy software only available in 32-bit), I would recommend the 64-bit version for future-proofing.
As of today, the latest version is based on Debian 12 (code name “Bookworm”) and comes with the Linux kernel 6.6.
Flashing the OS
To get the OS onto the SD card, you need to flash it. There are two common ways to do this:
- Using the Raspberry Pi Imager
- Using balenaEtcher
Previously, I used balenaEtcher, but the Raspberry Pi Imager has improved a lot and is now my go-to tool for flashing Raspberry Pi OS images.
The process is straightforward:
- Download the Raspberry Pi Imager from the official website:
- Install and open the Imager.
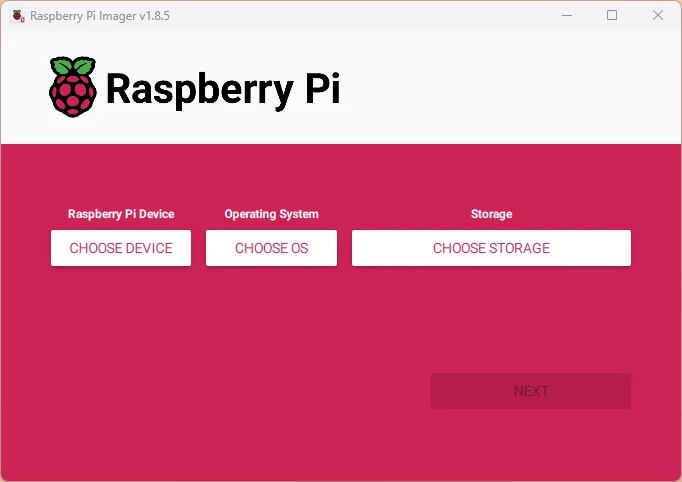
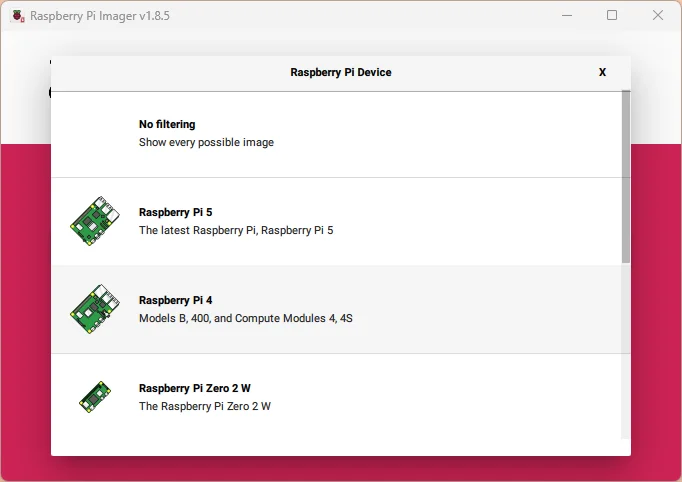
- Choose the Raspberry model you have.
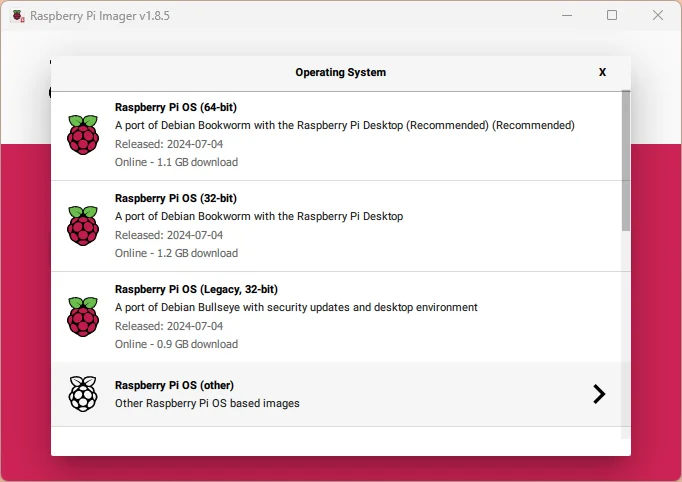
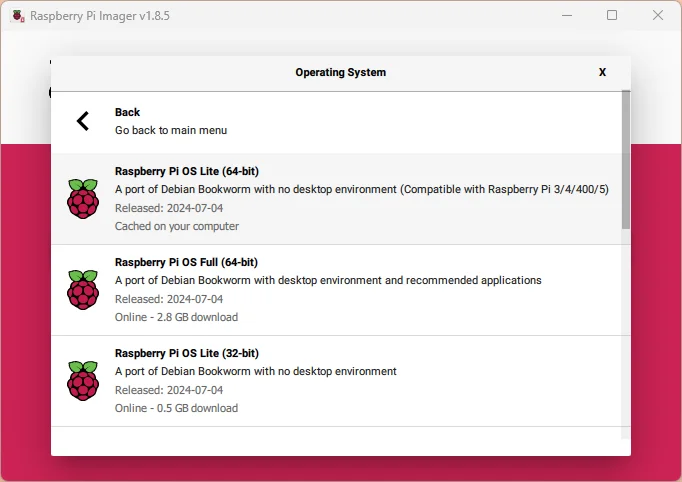
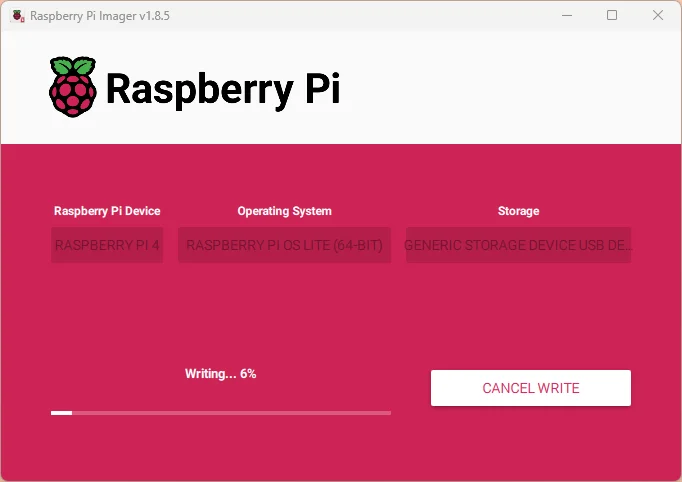
- Choose the OS you want to install. In this case, we choose “Raspberry Pi OS (other)” and then “Raspberry Pi OS Lite (64-bit)”.
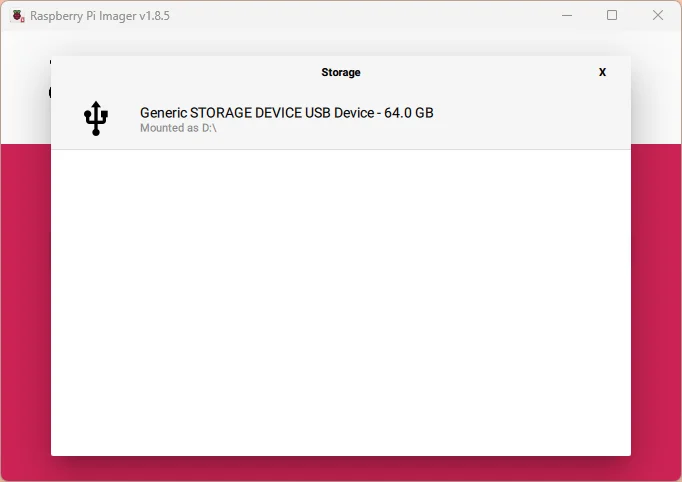
- Choose the SD card you want to flash. Make sure you select the correct one, as all data on it will be lost.
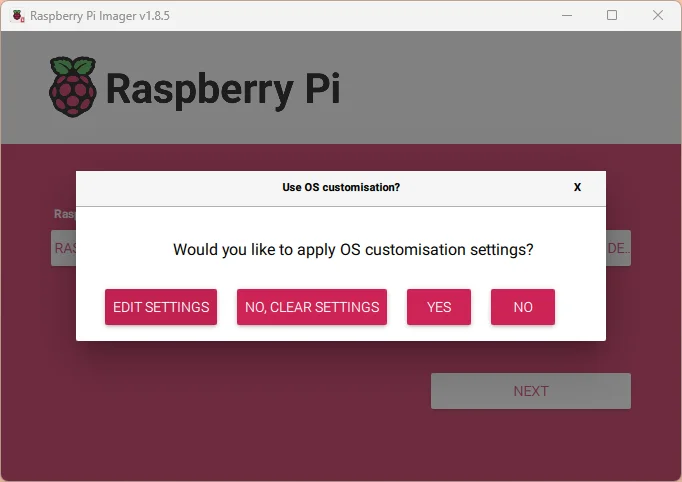
- Click “Edit settings” to go to the customisation screen.
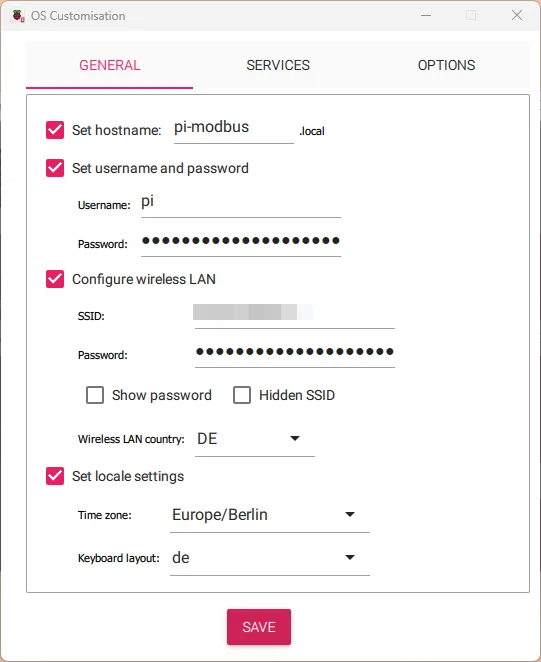
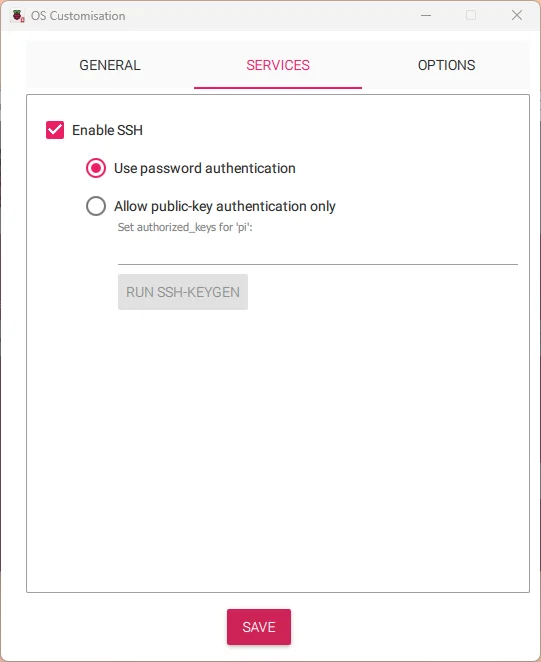
- Here you can set the hostname, change the default password, enable SSH, and configure the Wi-Fi. This step is optional but highly recommended for a headless setup.
- Confirm some dialogs and start the flashing process.
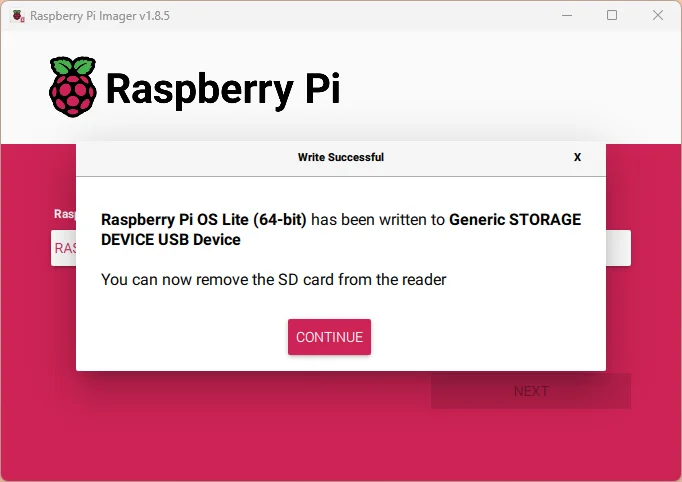
- Once the flashing is done, you can remove the SD card and insert it into the Raspberry Pi.
First Boot
After inserting the SD card into the Raspberry Pi, connect the power supply.
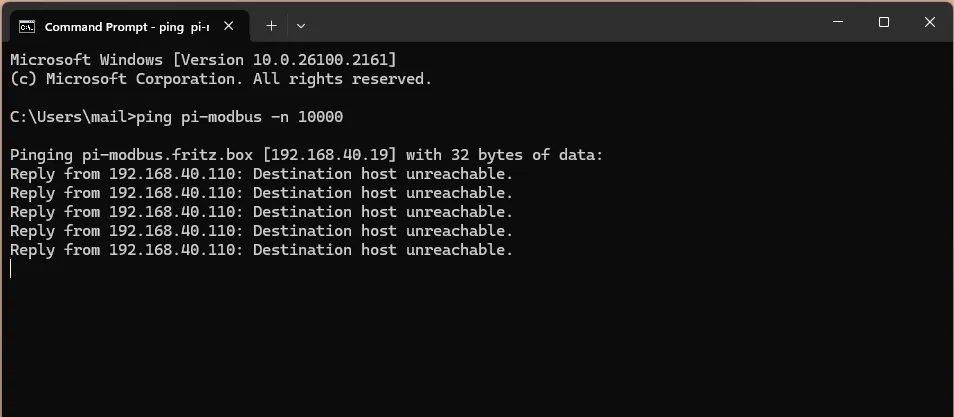
I like to constantly ping the Raspberry Pi to see when it’s ready.
ping pihost -n 10000Replace pihost with the hostname you set during the flashing process.
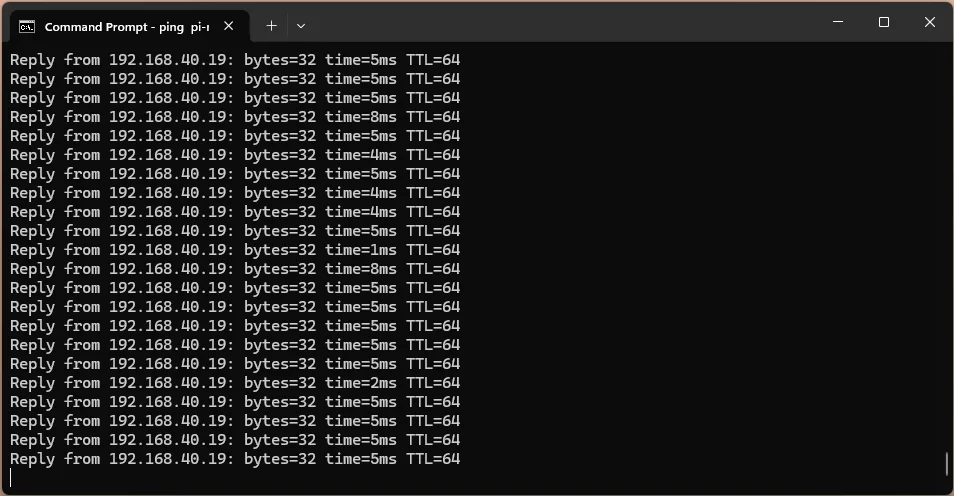
After a few seconds, you should see the Raspberry Pi responding to the pings.
If you enabled SSH, you can now connect to the Raspberry Pi via SSH.
The default hostname is raspberrypi, and the default user is pi with the password raspberry.
If you changed the hostname or password during the flashing process, use those instead.
As a Windows user, I recommend using Putty for SSH connections. If you’re on Linux or macOS, you can use the built-in terminal.
You may have to accept the fingerprint the first time you connect.

Optional
Enabling automatic SD card checks
To prevent data loss due to a corrupted SD card, you can enable automatic checks.
To check the file system on every boot and repair it if necessary, add fsck.mode=force to the cmdline.txt file:
sudo nano /boot/firmware/cmdline.txt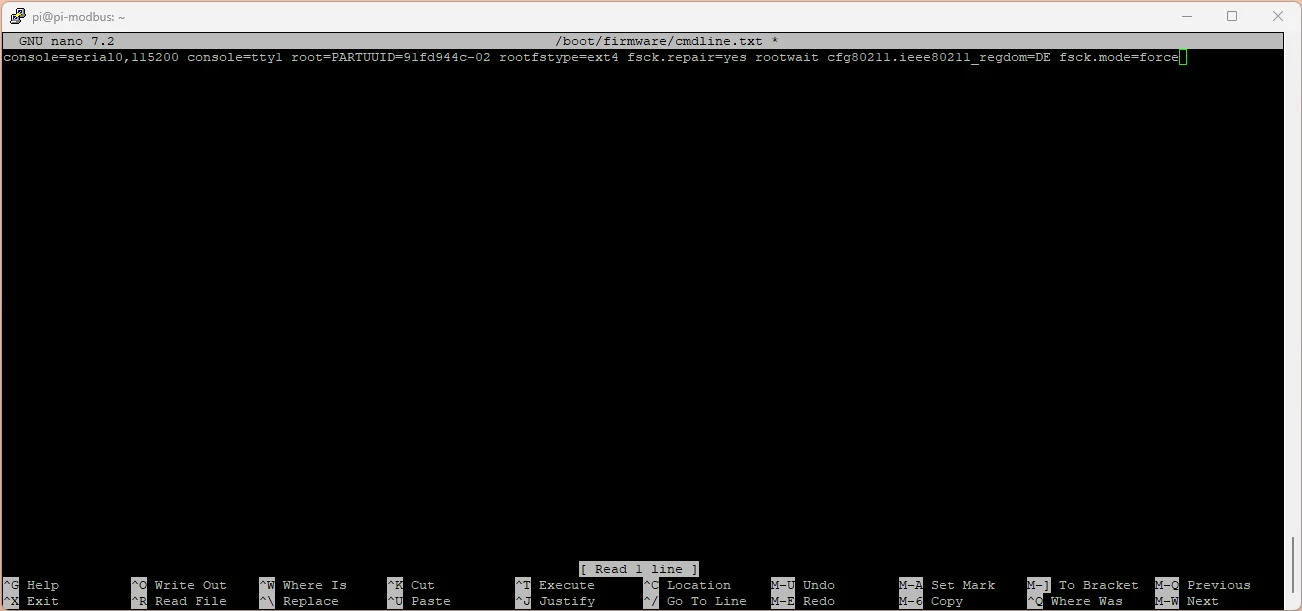
After rebooting, you can verify the changes with:
sudo cat /run/initramfs/fsck.logIt should look like this:
pi@pi-modbus:~ $ sudo cat /run/initramfs/fsck.log
Log of fsck -C -f -y -V -t ext4 /dev/mmcblk0p2
Thu Jan  1 00:00:04 1970

fsck from util-linux 2.38.1
[/sbin/fsck.ext4 (1) -- /dev/mmcblk0p2] fsck.ext4 -f -y -C0 /dev/mmcblk0p2
e2fsck 1.47.0 (5-Feb-2023)
Pass 1: Checking inodes, blocks, and sizes
Pass 2: Checking directory structure
Pass 3: Checking directory connectivity
Pass 4: Checking reference counts
Pass 5: Checking group summary information
rootfs: 61670/3685616 files (0.2% non-contiguous), 819354/15498240 blocks

Thu Jan  1 00:00:09 1970
----------------
You can ignore the date, as it’s not set on boot when the SD card is checked.
Enabling automatic updates
To keep your Raspberry Pi up-to-date, you can enable automatic updates with the unattended-upgrades package.
Install it with:
sudo apt install unattended-upgrades
sudo dpkg-reconfigure --priority=low unattended-upgrades
Confirm the dialog.

The last step is to add the Raspberry Pi Foundation repository to the list of allowed origins for automatic updates. To do this, check the repository list:
sudo apt policyIn this list you should see the Raspberry Pi Foundation repositories:
 500 http://archive.raspberrypi.com/debian bookworm/main armhf Packages
     release o=Raspberry Pi Foundation,a=stable,n=bookworm,l=Raspberry Pi Foundation,c=main,b=armhf
     origin archive.raspberrypi.com
 500 http://archive.raspberrypi.com/debian bookworm/main arm64 Packages
     release o=Raspberry Pi Foundation,a=stable,n=bookworm,l=Raspberry Pi Foundation,c=main,b=arm64
     origin archive.raspberrypi.com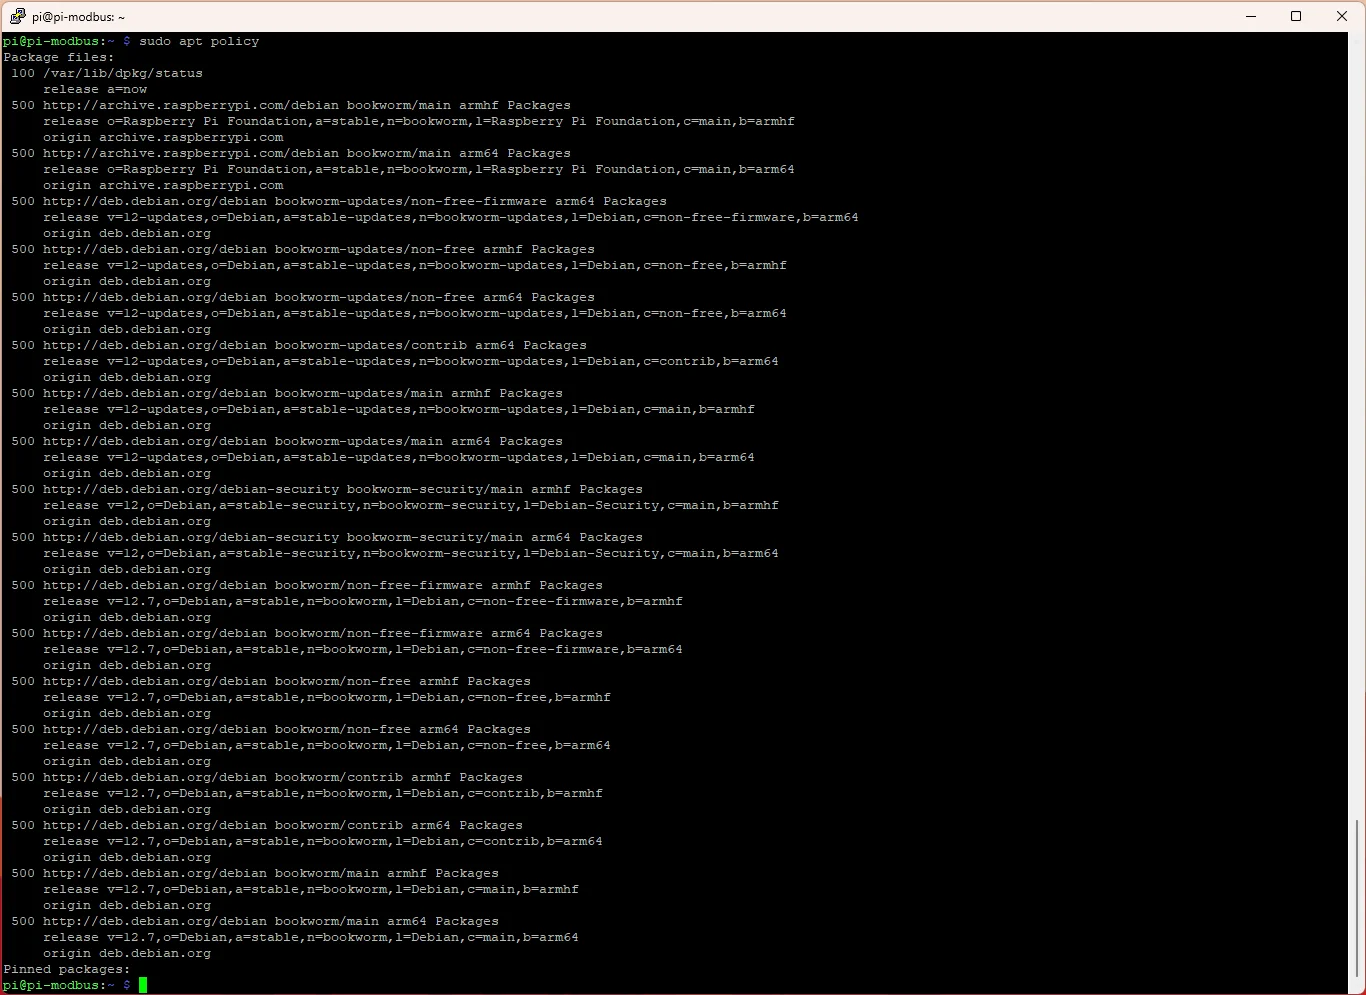
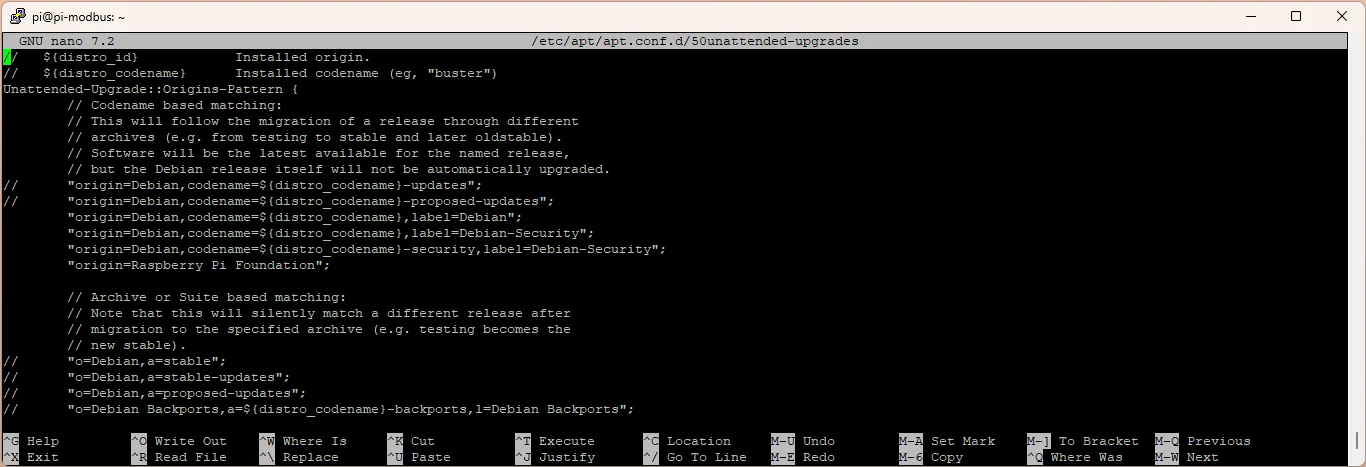
These have to be added to the list of allowed origins. We can do this by editing the unattended-upgrades configuration file:
sudo nano /etc/apt/apt.conf.d/50unattended-upgradesAdd the following lines to allow updates from the Raspberry Pi Foundation repositories:
Unattended-Upgrade::Origins-Pattern {
        "origin=Raspberry Pi Foundation";
};
To check if everything is set up correctly, you can run the unattended-upgrades command:
sudo unattended-upgrades --dry-run --verbose
This will simulate the update process and show you what would be updated. It should show, which packages would be upgraded.
You can then upgrade the system with:
sudo unattended-upgradesIt won’t give you any output, but you can check the logs to see what was updated.
cat /var/log/unattended-upgrades/unattended-upgrades.logTesting the SD card speed
For some projects, the speed of the SD card can be crucial.
To test the speed, you can use simple inbuilt tools like dd.
The following command writes 500MB of emptyness to the SD card and measures the speed:
dd if=/dev/zero of=~/test.tmp bs=1M count=500You can experiment with different block sizes (e.g. 500K for half the size) and counts to see how the speed changes for different workloads.
To read the file back and measure the read speed, clear the cache first, otherwise the read speed will be much higher than it should be (as high as 1GB/s for me):
sync; echo 3 | sudo tee /proc/sys/vm/drop_cachesSome websites say you should use the oflag=dsync option instead.
This dis not work for me on the current Raspberry Pi OS.
Then you can read the file back:
dd if=~/test.tmp of=/dev/null bs=1MWhen you’re done, you can delete the test file:
rm ~/test.tmpThis screenshot shows the output of the write test:
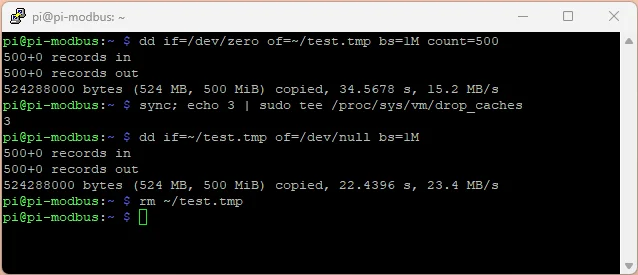
There are of course more sophisticated tools and methods available, but this should give you a good idea of the speed of your SD card.
One alternative I want to mention is this script from Jeff Geerling that uses hdparm and iozone for random read/write tests:
curl https://raw.githubusercontent.com/geerlingguy/raspberry-pi-dramble/master/setup/benchmarks/microsd-benchmarks.sh | sudo bashConclusion
Now you have a Raspberry Pi set up and ready to use. It will update itself automatically and check the file system on every boot. This should keep your Raspberry Pi running smoothly for a long time.
No Comments? No Problem.
This blog doesn't support comments, but your thoughts and questions are always welcome. Reach out through the contact details at the bottom of the page.
Support Me
If you found this page helpful and want to say thanks, you can support me here.
