Installing openHAB 3 on Raspberry Pi (openHABian)
Eiko WagenknechtThis post explains how to install the home automation software openHAB 3 on a Raspberry Pi. The guide for openHAB 2 can be found in another post.
Table of Contents
- Version
- Required Materials
- Download and Installation of Required Software
- Writing the Image to the SD Card
- Configuring Network and WiFi Access
- First Start of openHAB
- Basic Configuration of openHAB
- Optional: Activating the openHAB Console
- Optional: Setting a Static IP Address
- Restarting openHAB
- Settings in the Web Interface
- Access / Links
- Conclusion
Version
At the time of publishing this article (December 22, 2020), openHAB 3.0 has just been released. If you’re reading this later, some aspects may have changed with newer versions. Please leave a comment if you notice any discrepancies, and I’ll update the guide.
Required Materials
- Raspberry Pi (e.g., Raspberry Pi 4 with 4GB RAM as a complete kit). The 8GB RAM version still has issues and is not recommended.
- A microSD card suitable for Raspberry Pi, preferably with 16GB or more storage. In 2020 alone, I lost 5 cheaper cards due to read/write errors and now only use the Samsung PRO Endurance 64GB.
- Card reader for the microSD card.
Download and Installation of Required Software
To install openHAB on a Raspberry Pi, you’ll need 3 downloads:
- The openHABian Image, currently in version 1.6.2. When downloading, you need to get the openhabian-pi-raspios32-*.img.xz file (not .zip).
- Balena Etcher for writing the image to the SD card.
- Putty for connecting via SSH. Choose the appropriate version for your system. In my case, it’s the 64-bit MSI Installer.
Install Etcher and Putty after downloading them.
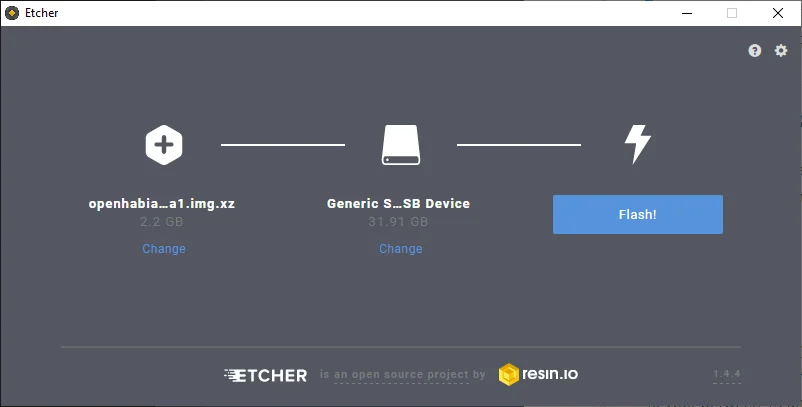
Writing the Image to the SD Card
To write the image to the SD card, first connect the card and card reader to your computer. Then start Etcher, select the downloaded .img.xz file in the first menu item, and the SD card in the second. The “Flash!” button starts the process.
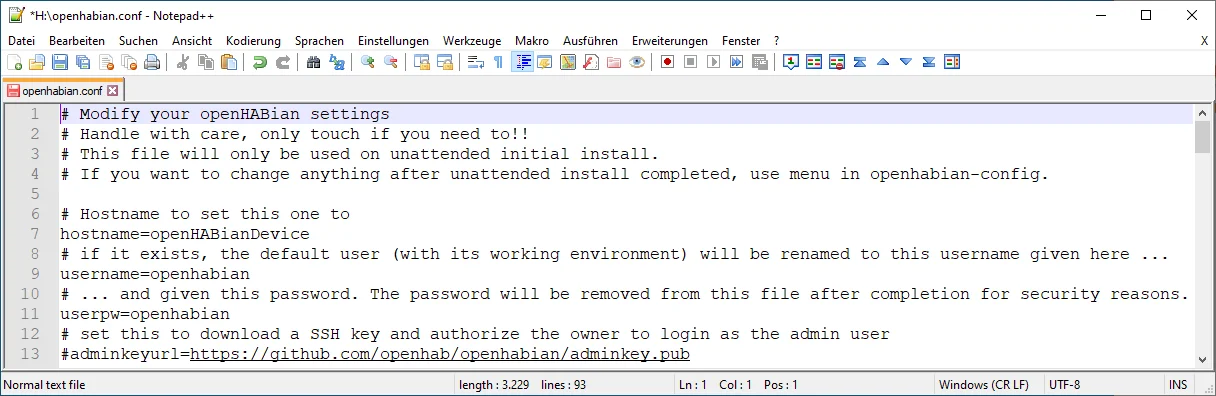
Configuring Network and WiFi Access
If the Raspberry Pi will connect to the network via WiFi rather than ethernet cable, you’ll need to edit the openhabian.conf file on the boot partition of the SD card. If the partition isn’t showing up, try removing the SD card from the reader and reinserting it so it can be recognized again. Editing can be done with any text editor. Simply replace the credentials between the quotation marks with the appropriate ones for your WiFi.
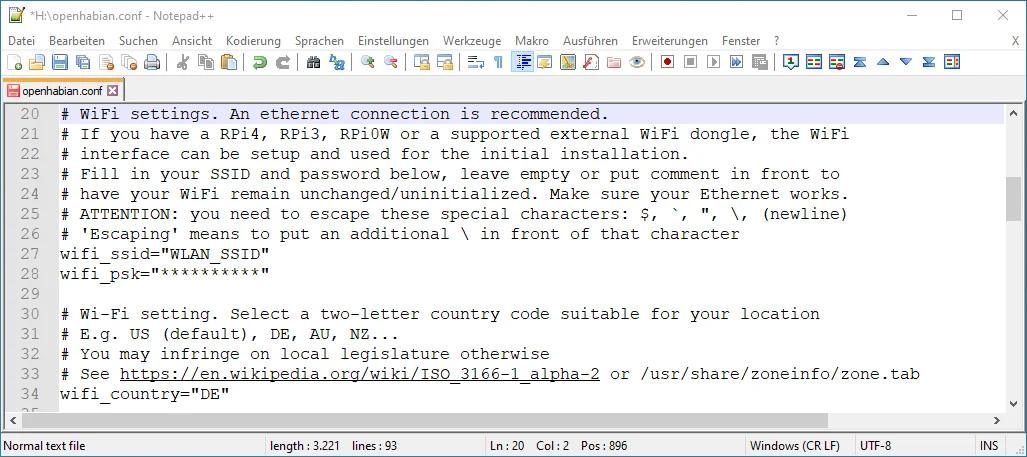
You can also change the hostname here, which is the address that will be used to reach the Raspberry Pi on the network. This can be done later as well, but since the file is already open… simply replace openHABianDevice with the appropriate hostname, in my case pi-openhab3. I’ll use pi-openhab3 as the hostname throughout this guide. If you choose something different, you’ll need to adapt accordingly later.
First Start of openHAB
The prepared SD card can now be inserted into the Raspberry Pi, which then should be connected to a network cable (if not using WiFi) and power supply (in that order!). This boots up the system and performs some configuration steps in the background. New versions will be downloaded from the internet, installed, etc. Depending on your connection, this can take some time. For me, it took about 30 minutes despite using a Raspberry Pi 4 and a fast SD card. There’s no progress indicator during this time. It’s important not to disconnect the power from the Raspberry Pi - just wait!
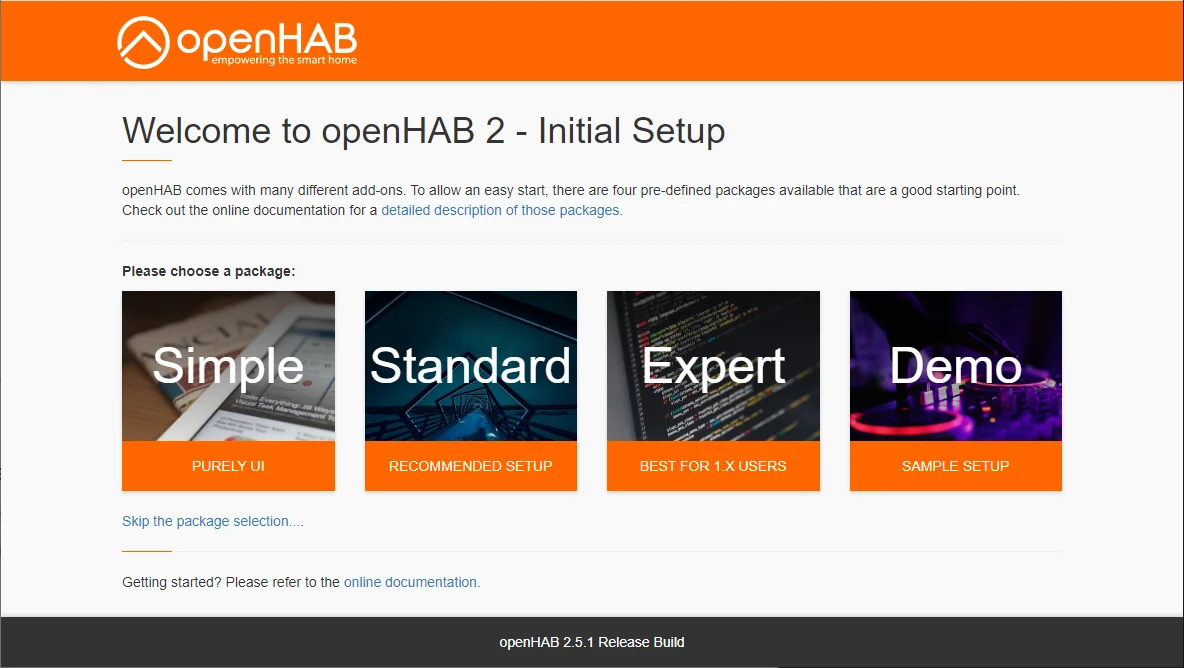
You’ll know this step is complete when the welcome page appears at the URL http://pi-openhab3:8080:
Basic Configuration of openHAB
At this point, we do not continue in the web interface but instead use SSH in the command line of the system to make some basic settings.
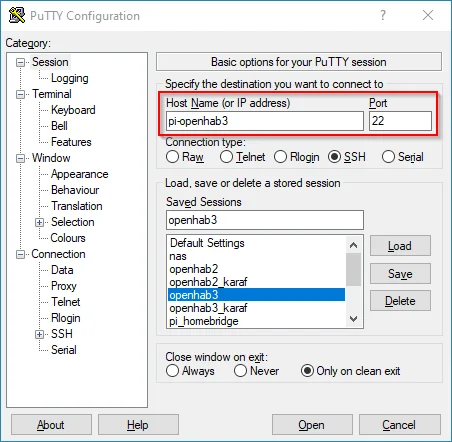
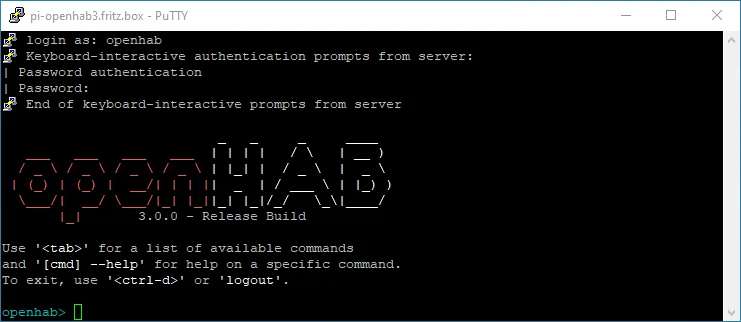
We connect to the system using Putty. It can be reached at:
- Host: pi-openhab3 (or whatever you chose above)
- Port: 22
- User: openhabian
- Password: openhabian

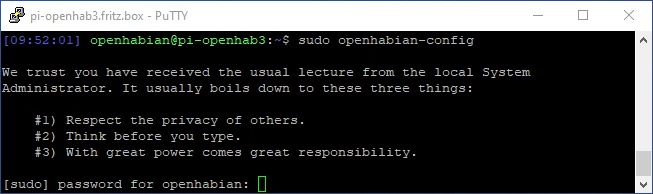
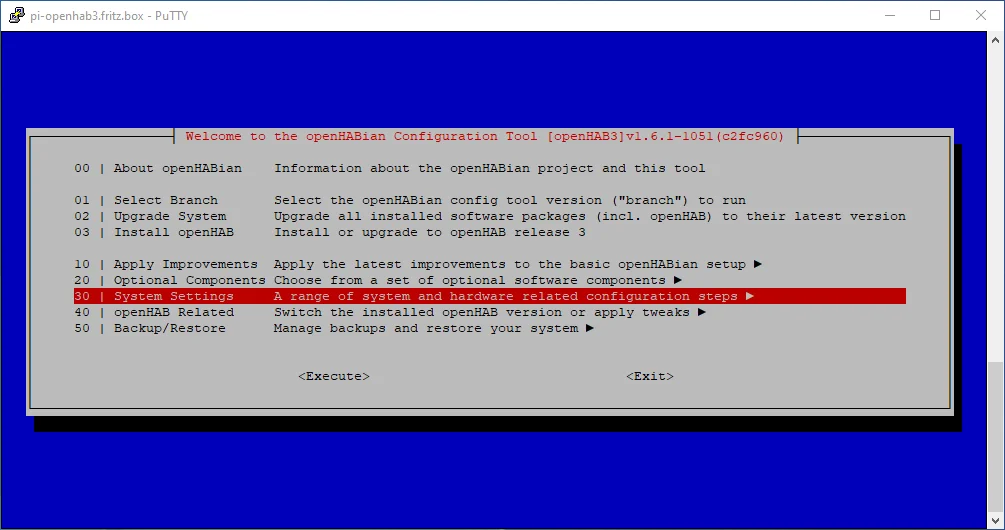
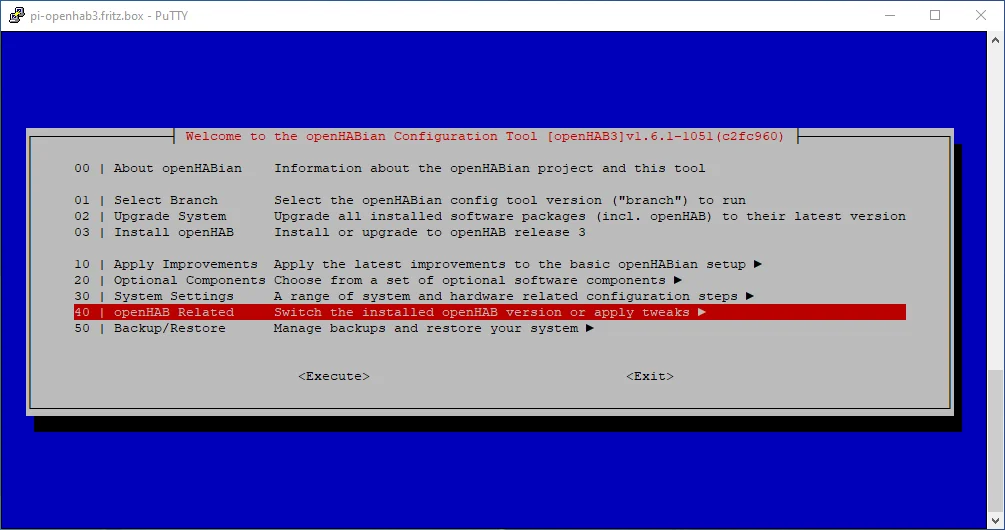
For configuration, we use the openhabian-config tool, which is started with root rights using the command sudo openhabian-config. The password is still openhabian.
There are several settings to configure here. Navigate between menu items using TAB and the arrow keys, and confirm with ENTER.
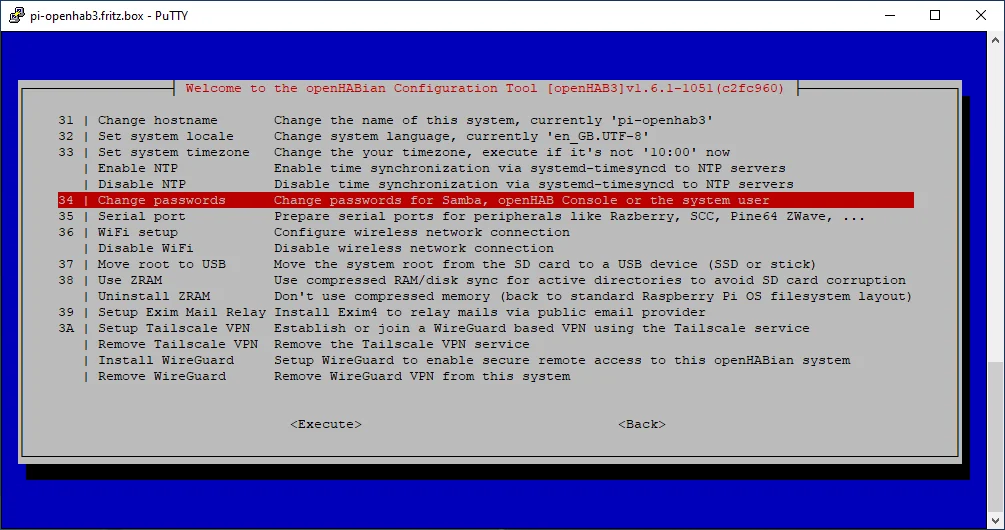
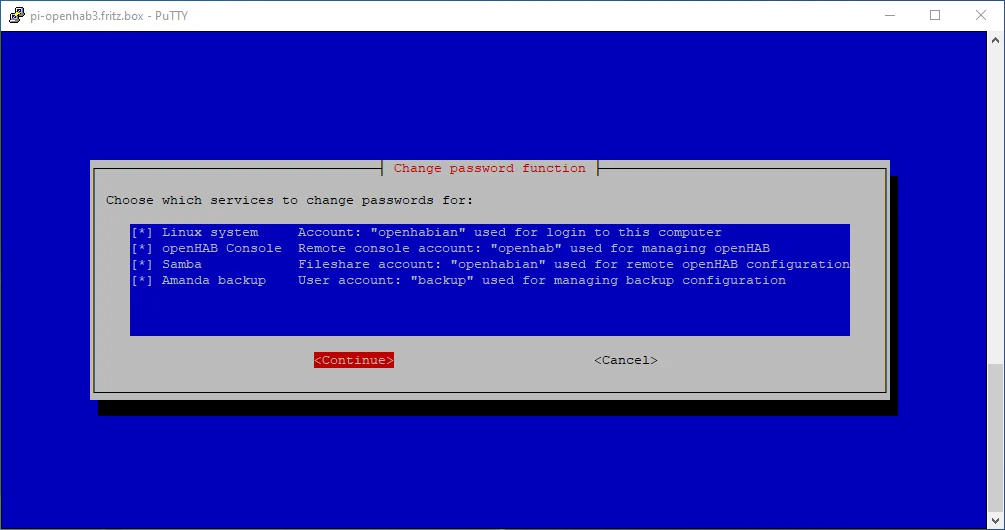
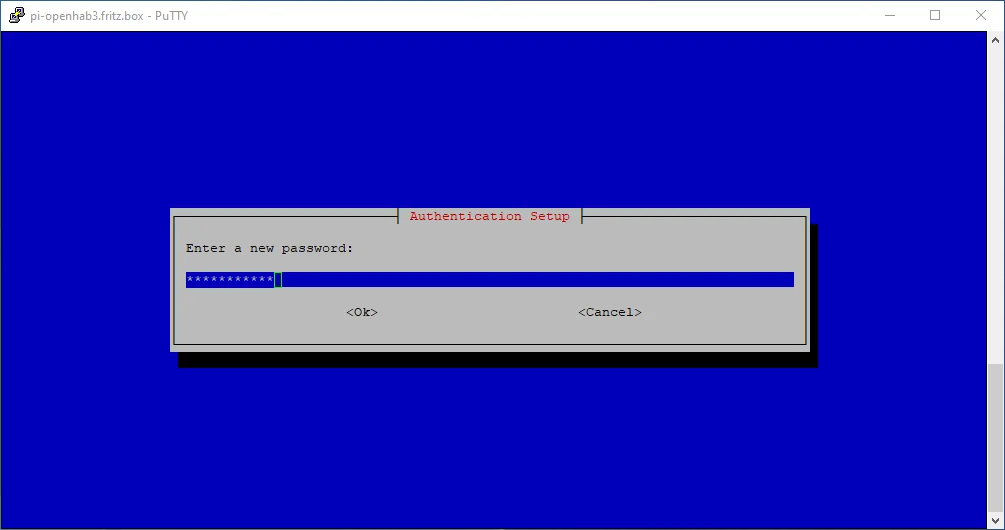
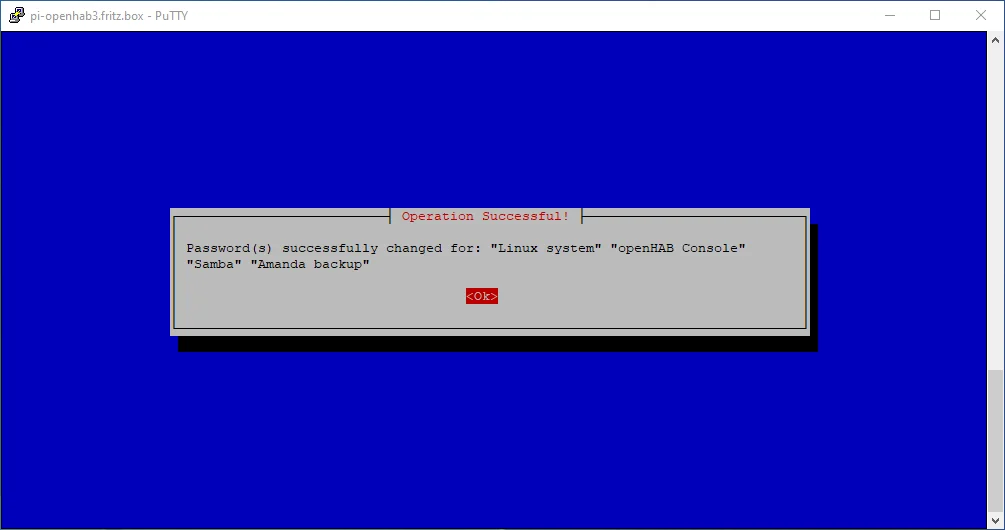
First, you should set a new password under System Settings. This is strongly recommended, as otherwise anyone on the network can access and modify the complete openHAB configuration. The setting is in the submenu Change Passwords. It’s best to select all services (use the space bar to set checkmarks) and then enter and confirm the new password:

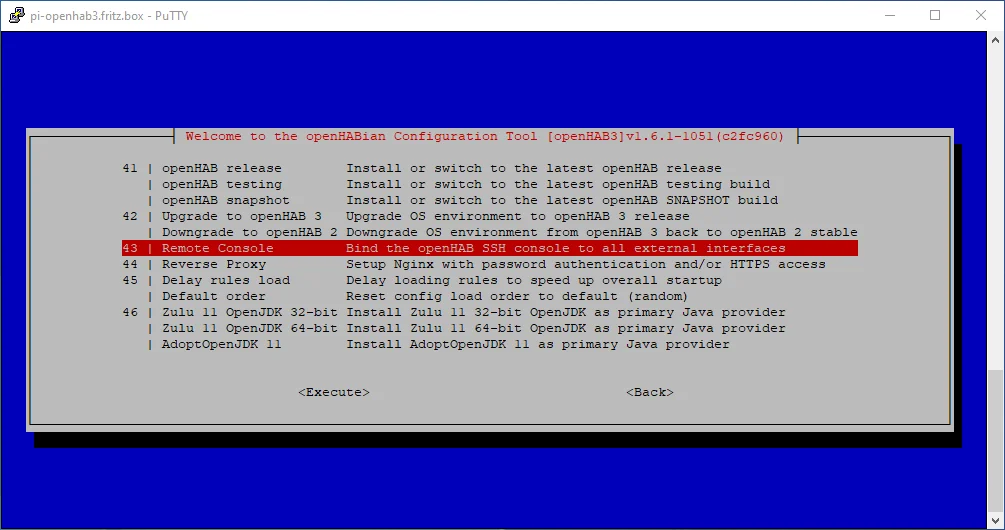
Optional: Activating the openHAB Console
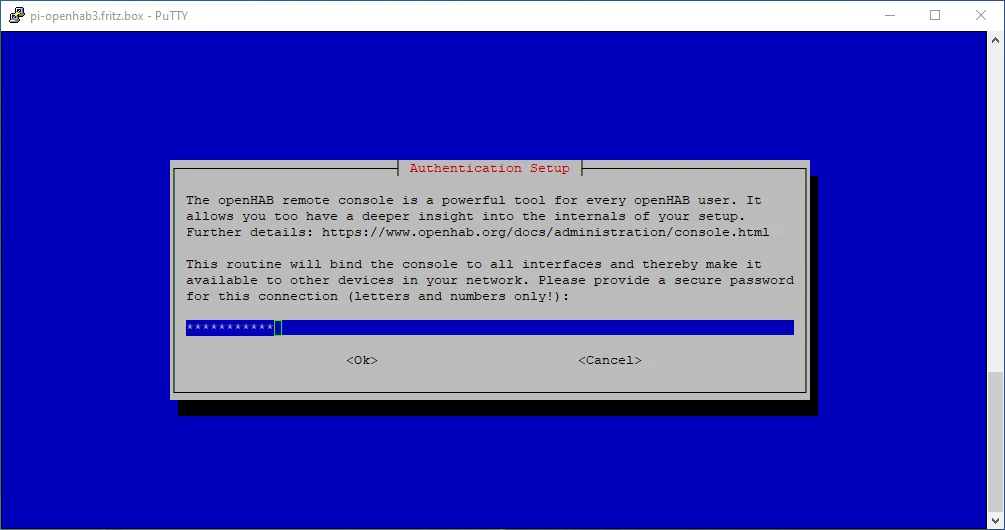
openHAB offers its own text interface for many administrative tasks. Since openHAB 3, it’s simply called Console, formerly known as Karaf Console. It’s accessible via SSH in parallel to the normal SSH shell but on a different port (8101). To make it accessible from the network, access needs to be enabled.
This is done in the menu openHAB related under Remote Console. You’ll need to enter a password again (e.g., the same as above).
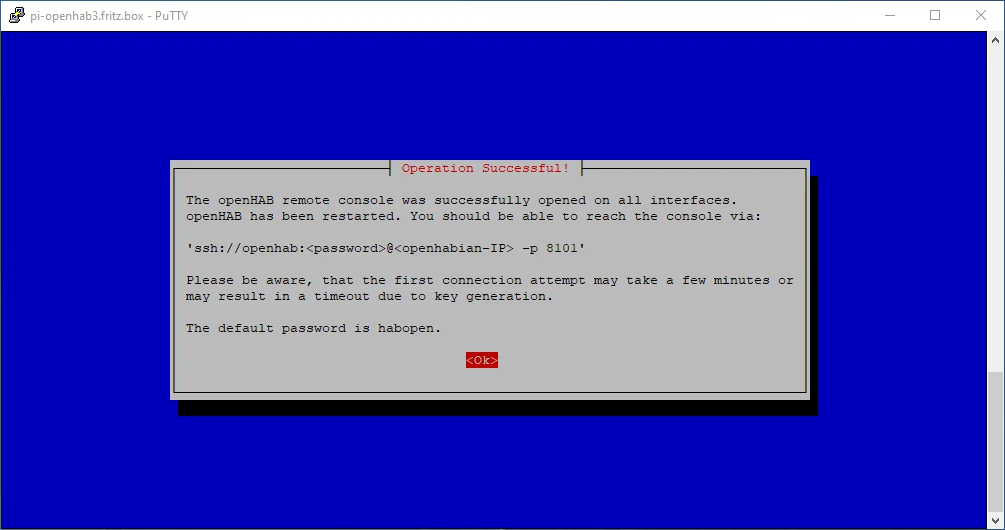
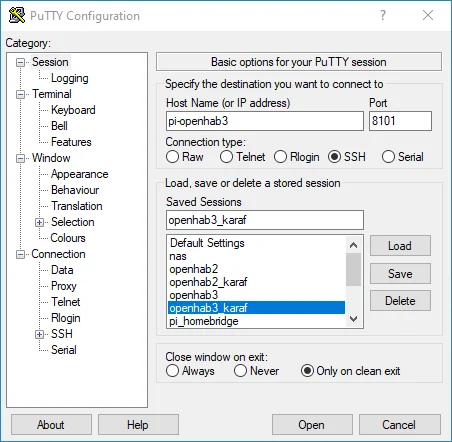
To test if the setting was successful, you can now connect to the console with Putty.
- Host: pi-openhab3 (or whatever you chose above)
- Port: 8101
- User: openhab
- Password: [the password you just set]
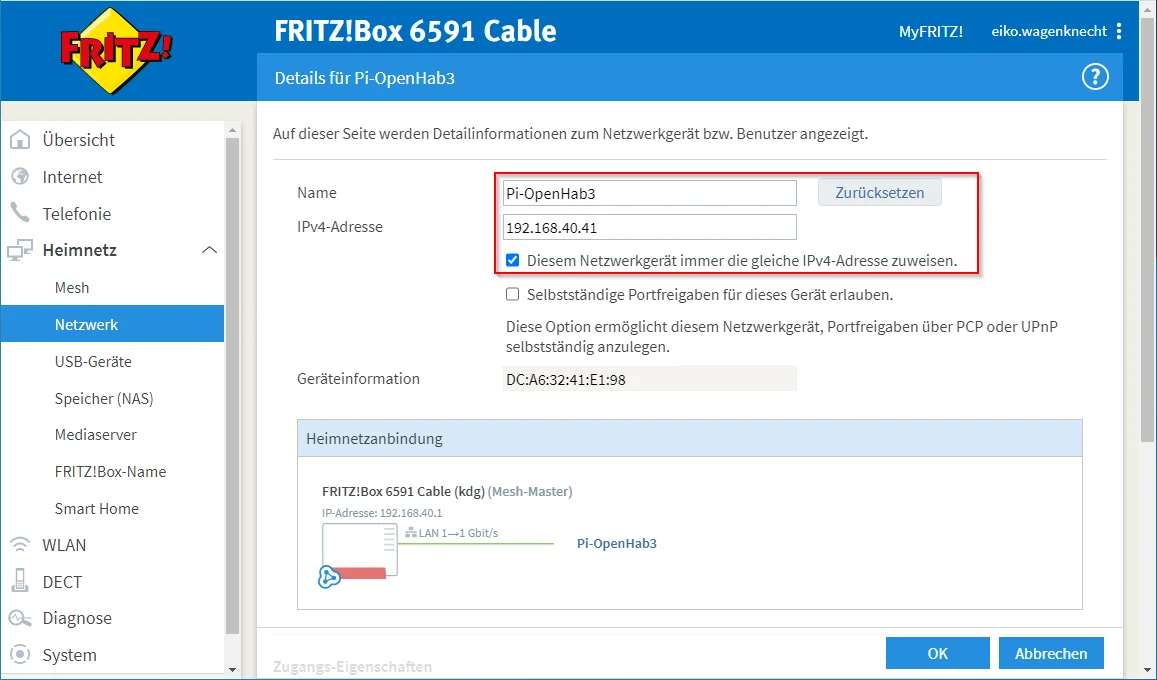
Optional: Setting a Static IP Address
Some use cases require openHAB to run with a static IP address. It makes sense to set this up now. The easiest way is if you have a FritzBox router or a router with similar functionality. In this case, the IP can be configured there as a static DHCP lease. In the case of the FritzBox, this is done by checking “Always assign this network device the same IPv4 address.”
Restarting openHAB
For all settings to take effect, you should run the command “sudo reboot” in the normal SSH console.
Settings in the Web Interface
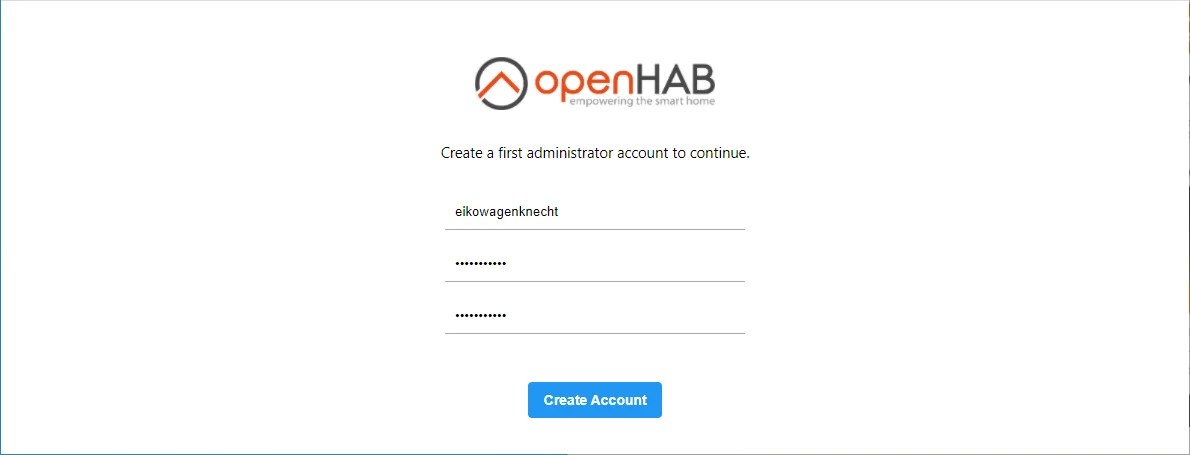
Now it’s finally time to revisit the web interface at http://pi-openhab3:8080. The first step is to create a user account.
All further settings can also be adjusted later, but I recommend configuring these few settings right away to have everything properly set up.
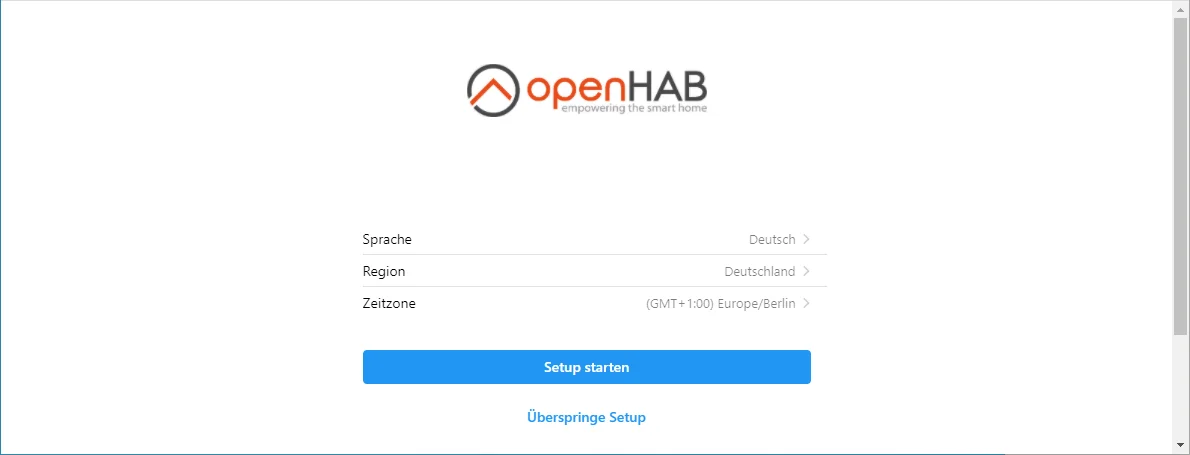
Next comes the region selection:
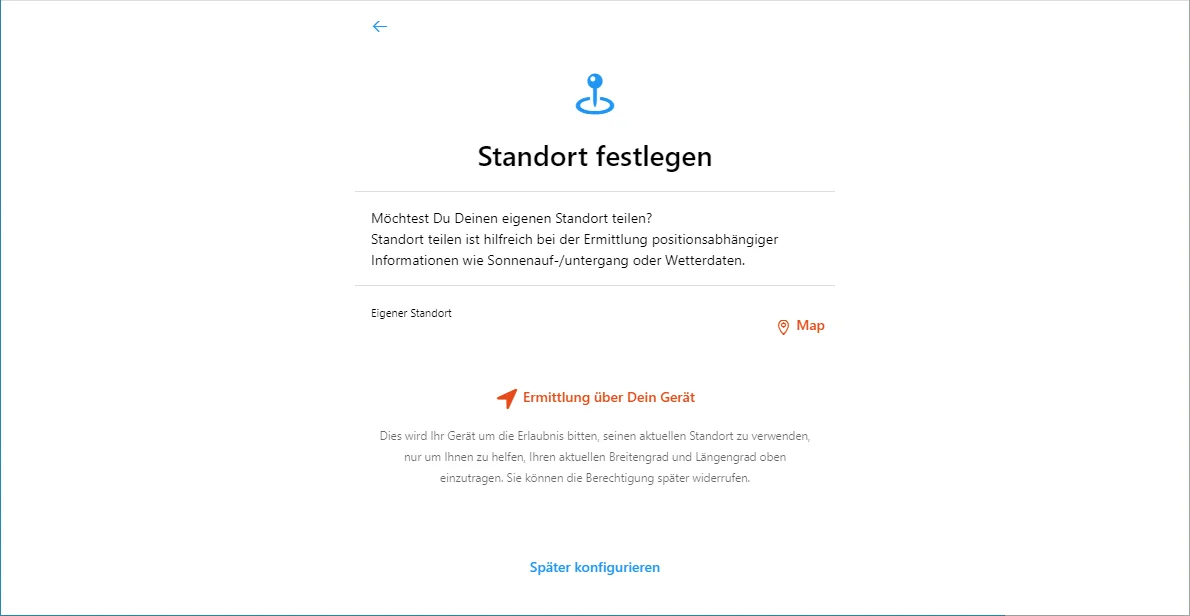
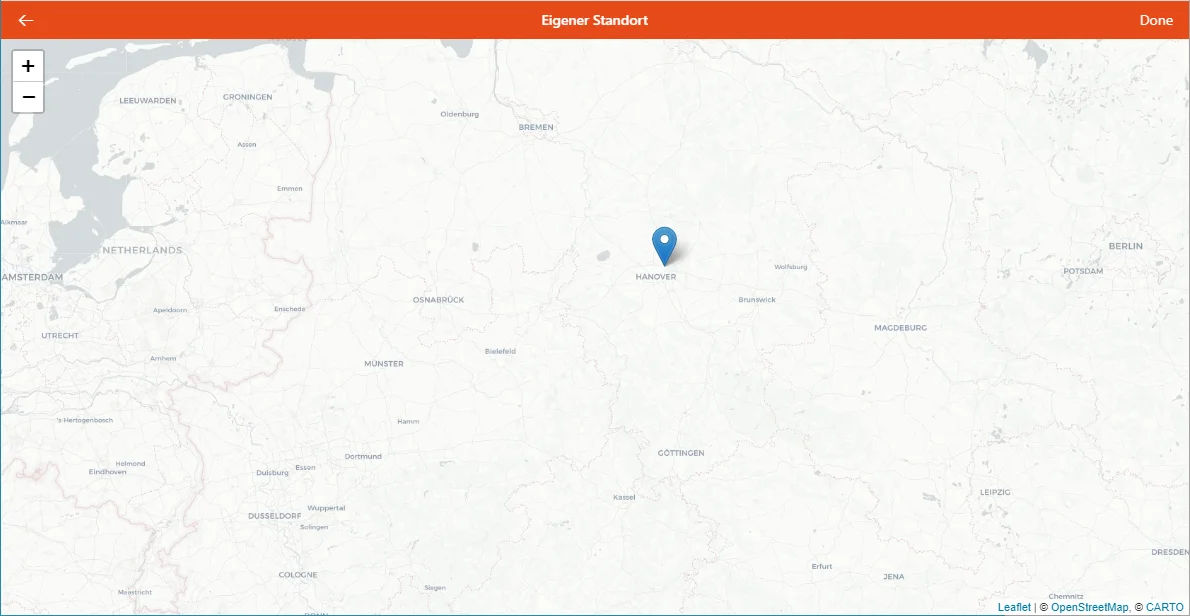
Then we configure the location (using the Map for visual selection):
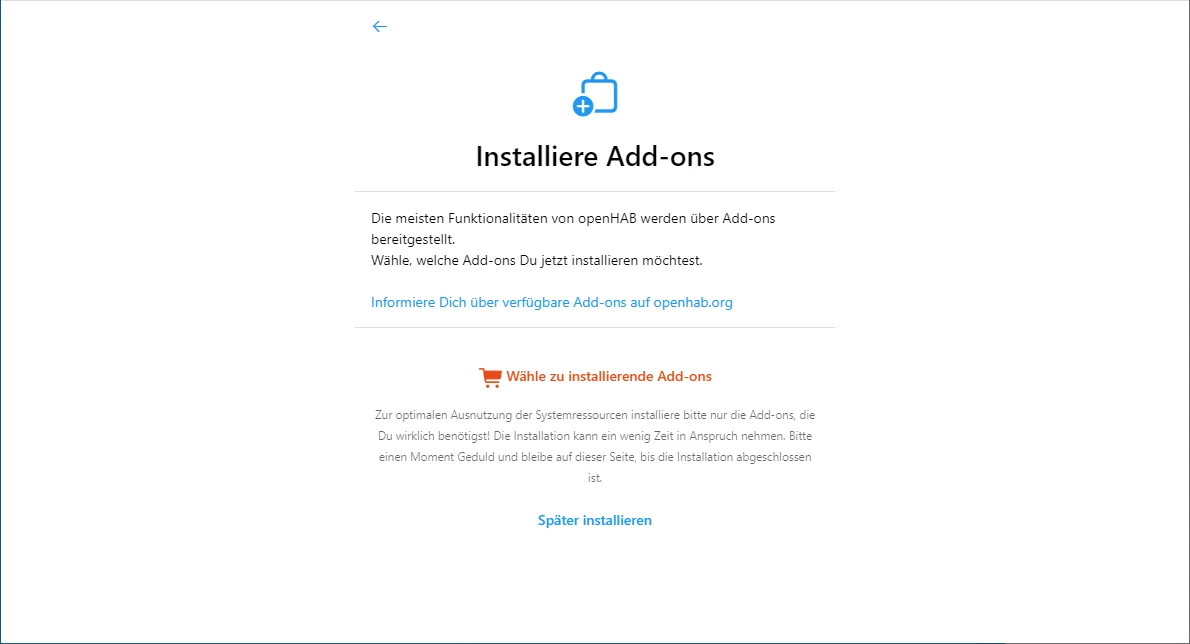
We’ll skip the add-on installation for now by selecting Install Later.
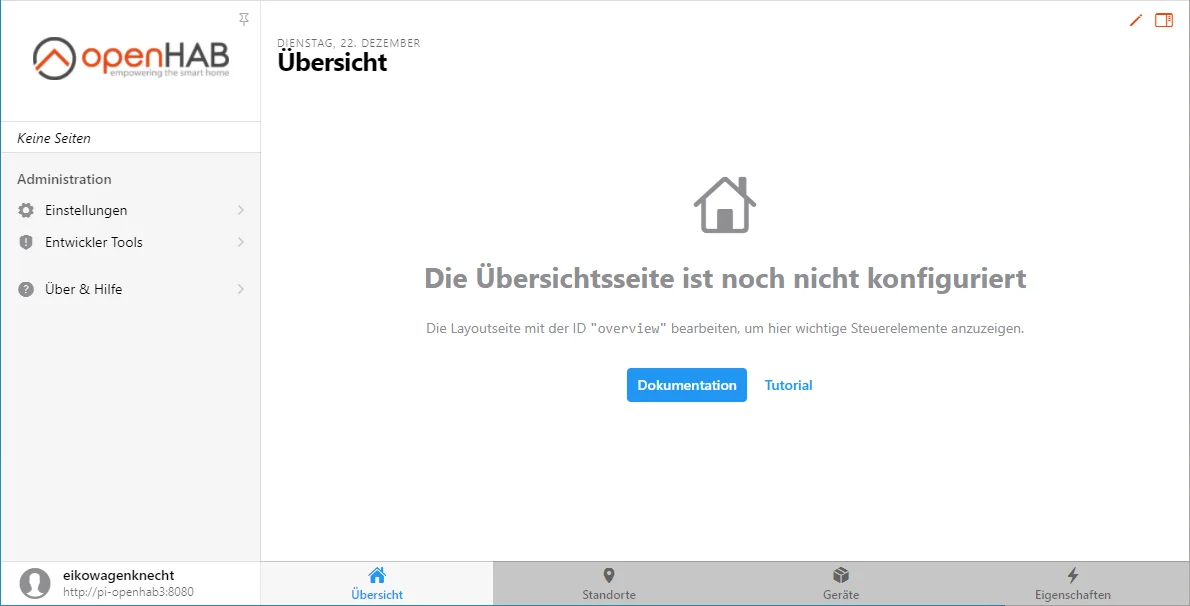
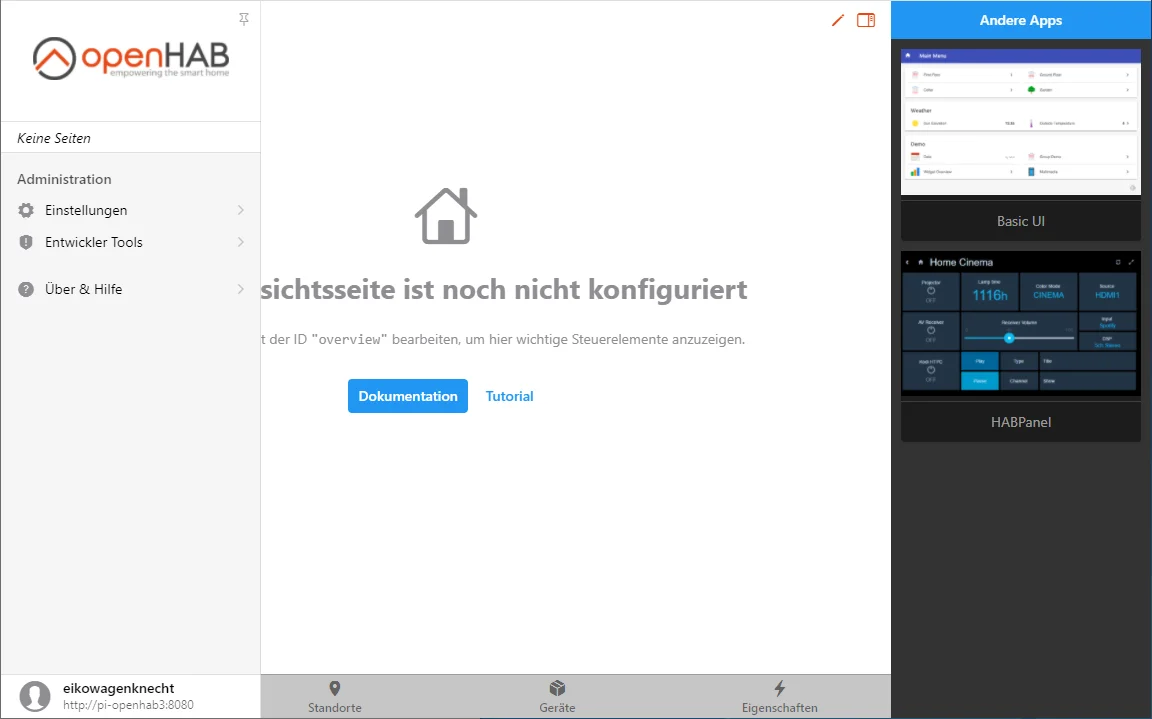
And now openHAB presents the new Main UI with the start page:
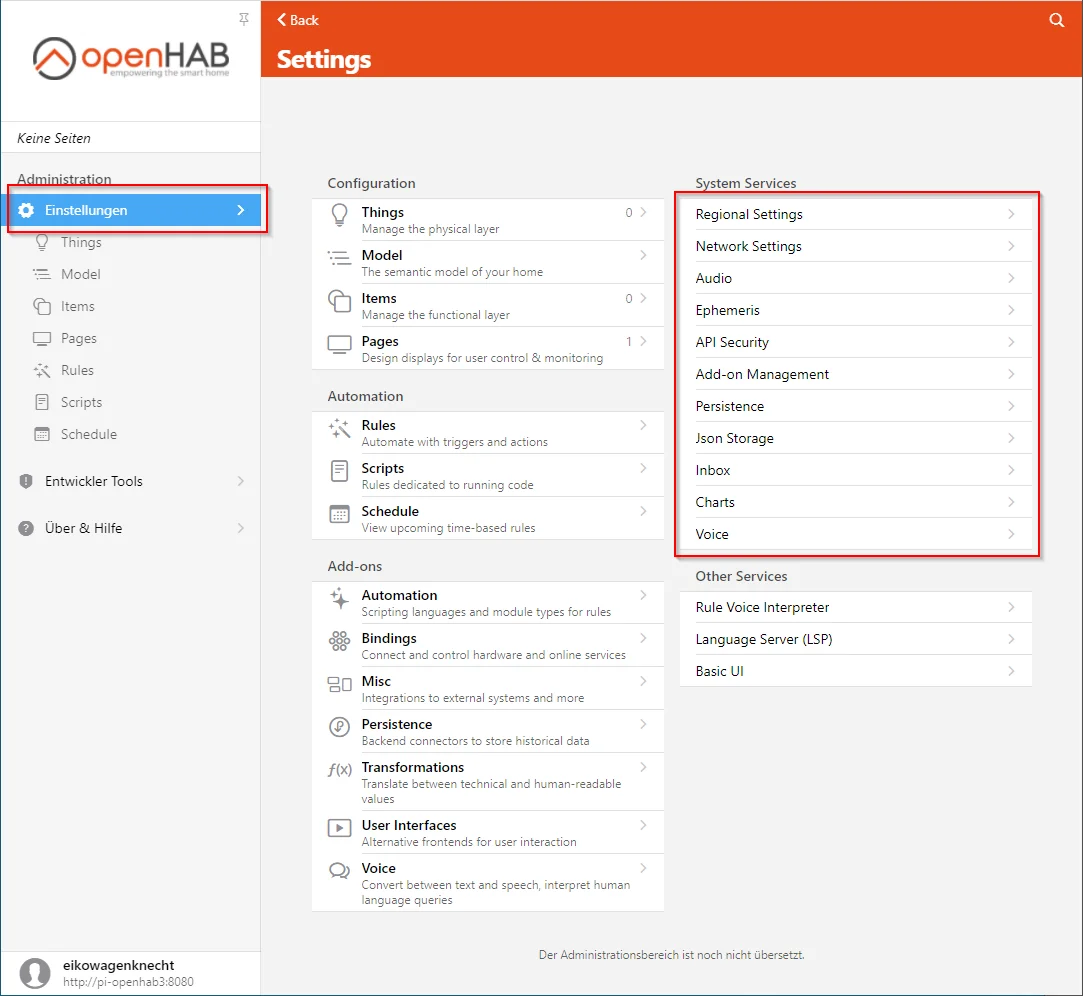
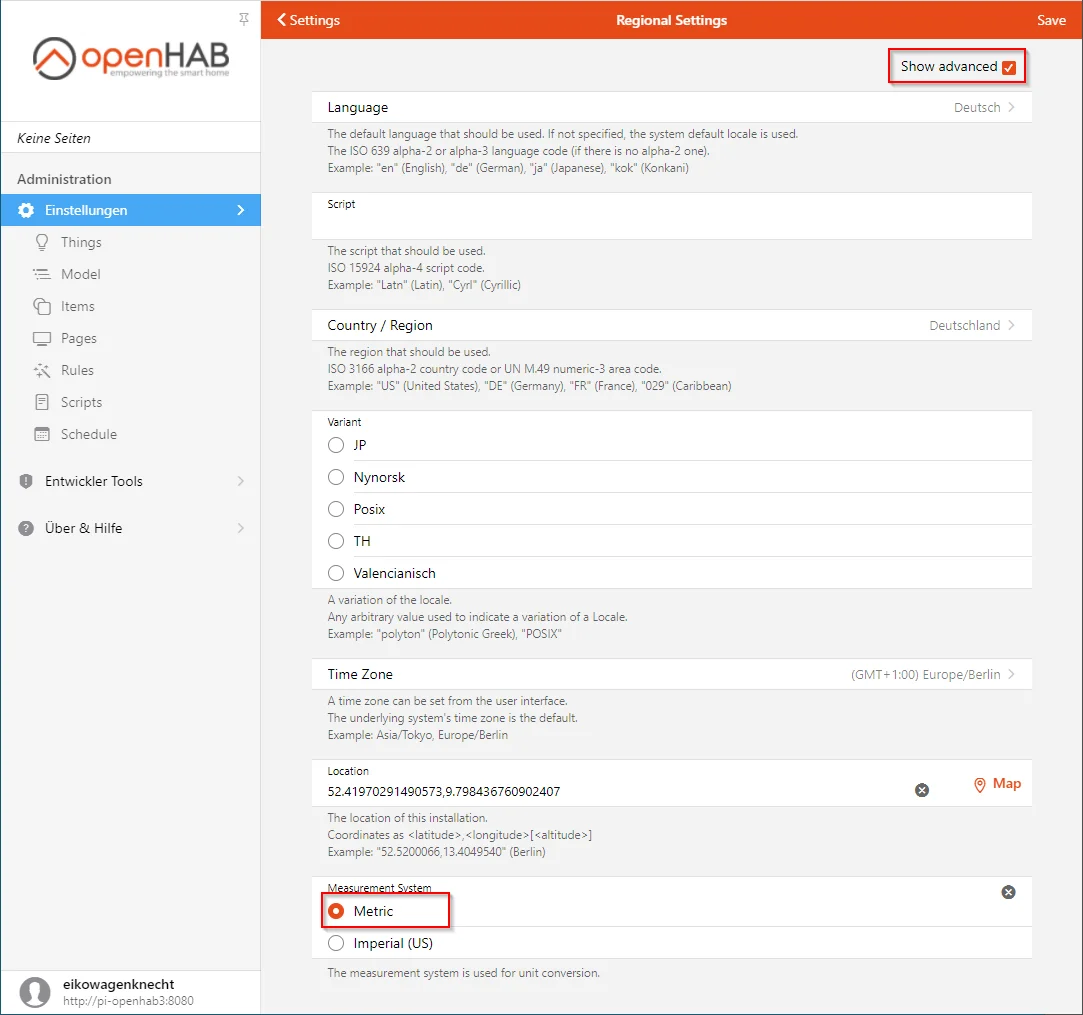
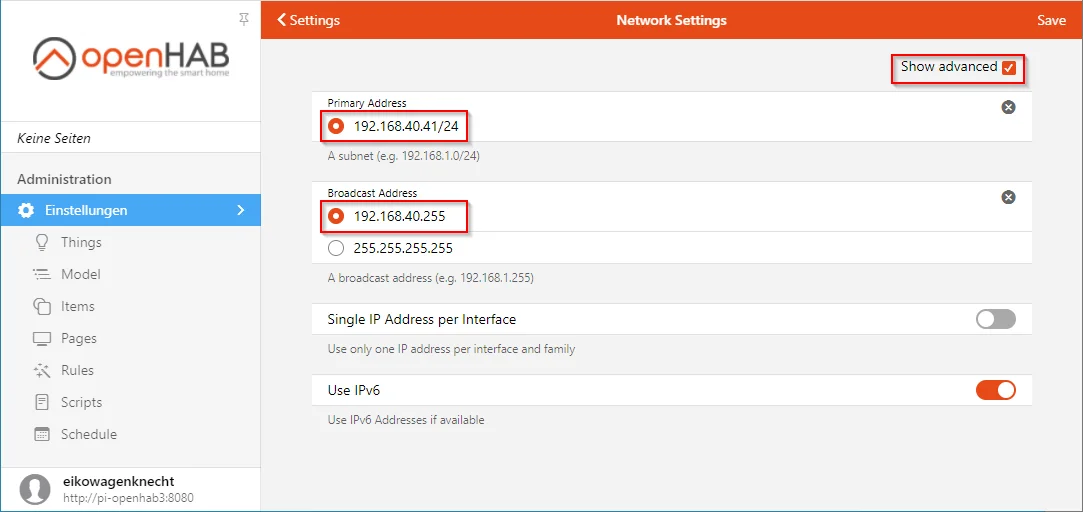
Under Settings there are a few more things to configure. This interface has not yet been translated from English, so it’s correct that you see it in English. I always configure the Network, Region, and Ephemeris (holidays) settings, which look something like this:
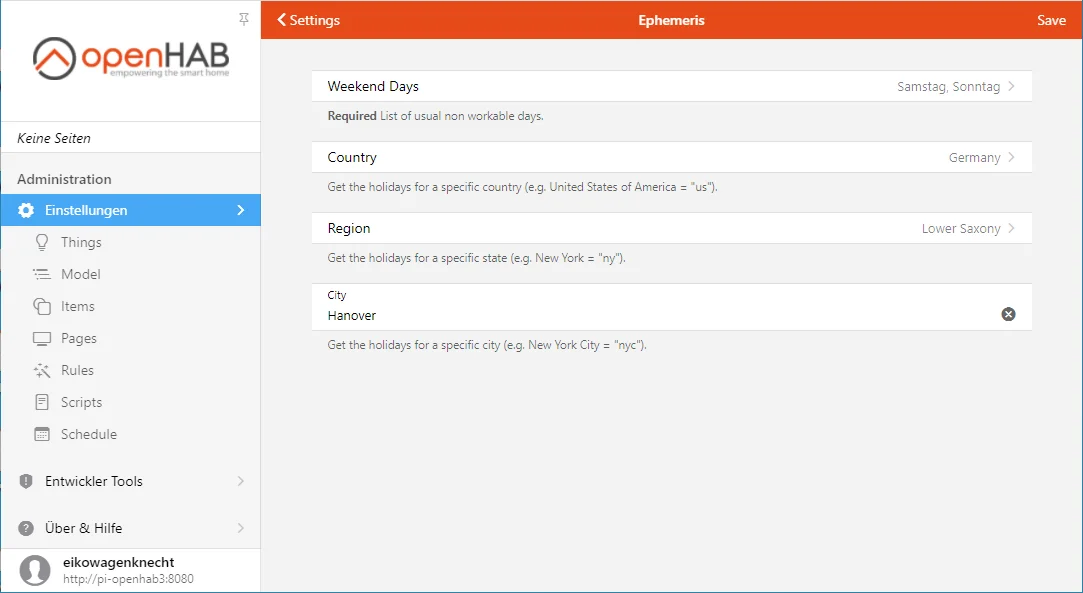
Currently, there’s a bug in the Ephemeris settings, so that after selecting Germany under Region, only regions from the United Kingdom can still be selected. You can work around this by saving and then reopening the Ephemeris page. The German states will then be available.
Access / Links
Those who have already used openHAB 2 will miss the start screen where the various pages could be called up (Paper UI, Basic UI, Log Viewer, …). As a partial replacement in OH3, the Other Apps area in the top right of the MainUI serves this purpose. However, not all entries are included there; for example, the Log Viewer is missing.
Therefore, I’ve documented the links here; I simply saved them as bookmarks in my browser.
| URL | Description |
|---|---|
http://pi-openhab3:8080/ | MainUI (unencrypted) |
https://pi-openhab3:8443/ | MainUI (encrypted) |
http://pi-openhab3:9001/ | Frontail Log Viewer (unencrypted) |
http://pi-openhab3:8080/habpanel/index.html | HABPanel (unencrypted) |
https://pi-openhab3:8443/habpanel/index.html | HABPanel (encrypted) |
http://pi-openhab3:8080/basicui/app | Basic UI (unencrypted) |
https://pi-openhab3:8443/basicui/app | Basic UI (encrypted) |
Conclusion
That’s it, openHAB is now installed and running. Further configuration can begin! Future posts will cover the configuration of openHAB 3.
I look forward to your comments on whether this post has been helpful. Please feel free to write if you have questions or if anything remains unclear. Or share your experiences if you’ve used this guide to implement exciting automation projects.
No Comments? No Problem.
This blog doesn't support comments, but your thoughts and questions are always welcome. Reach out through the contact details at the bottom of the page.
Support Me
If you found this page helpful and want to say thanks, you can support me here.