Raspberry Pi - Installing Raspi OS
Eiko WagenknechtFor many home automation projects, a properly set up Raspberry Pi is a fundamental requirement. This guide walks you through the process of installing the Raspi OS operating system on your Raspberry Pi 3 or 4 and preparing it for use. From selecting the right hardware to installing the operating system and basic configuration, everything necessary is explained so that you can quickly and easily use your Raspberry Pi for your smart home projects.
Table of Contents
- Version
- Required Materials
- Prerequisites
- 1) Download and Installation of Required Software
- 2) Writing the Image to the SD Card
- 3) Activating the WiFi Connection
- 4) First Boot
- 5) Connecting via SSH
- 6) Basic Configuration
- 7) Optional: Setting a Static IP Address
- 8) Optional: Creating a Backup
- Conclusion
Version
At the time of writing this article, the current version is Raspi OS from March 4, 2021, with kernel 5.10. If you’re reading this later, something might have changed with a newer version. Feel free to leave a comment, and I’ll update the guide accordingly.
Required Materials
- Raspberry Pi (e.g., the Raspberry Pi 4 with 4GB RAM as a complete kit, approx. $95).
- A microSD card suitable for the Raspberry Pi, preferably with 16GB or more storage. In 2020 alone, I lost 5 inexpensive cards due to read/write errors and now only use the Samsung PRO Endurance 64GB (approx. $14).
- Card reader for the microSD card (e.g., Transcend TS-RDF9K2, approx. $14).
Prerequisites
You have a Raspberry Pi, power supply, SD card, and card reader available, and you have access to a Windows PC.
1) Download and Installation of Required Software
For the installation, you will need:
- The latest version of the Raspberry Pi operating system “Raspi OS” (https://www.raspberrypi.org/software/operating-systems/)
- Download the file labeled “Raspberry Pi OS Lite”, approx. 400-500MB.
- Etcher (https://www.balena.io/etcher/) for writing the image to the SD card
- Putty (https://www.chiark.greenend.org.uk/~sgtatham/putty/latest.html) for connecting via SSH
- Depending on your system, you will probably need the 64-bit MSI installer
Install Etcher and Putty after downloading them.
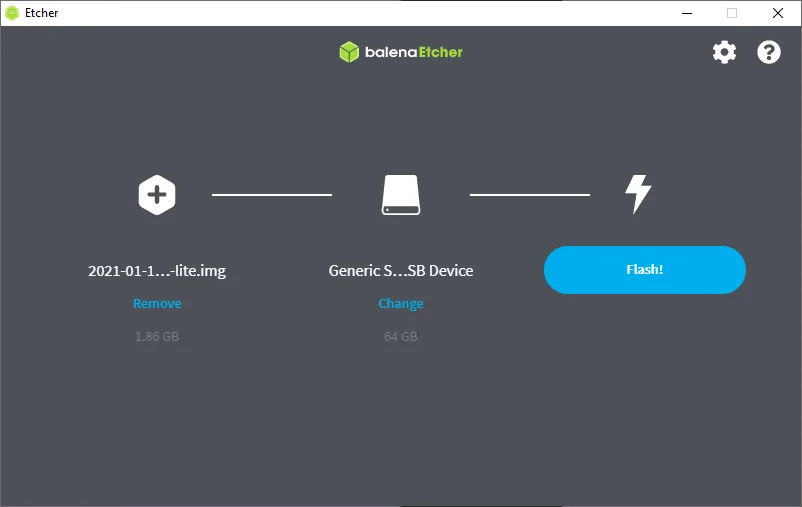
2) Writing the Image to the SD Card
To write the image to the SD card, first connect the card with the card reader. Then start Etcher and select the downloaded .zip file in the first menu item and the SD card in the second point. The “Flash!” button starts the process.
3) Activating the WiFi Connection
After the writing to the SD card is complete, open it in Explorer. The drive is labeled “boot”.
To enable remote access to the Raspberry Pi via SSH, create an empty file named “ssh” there:
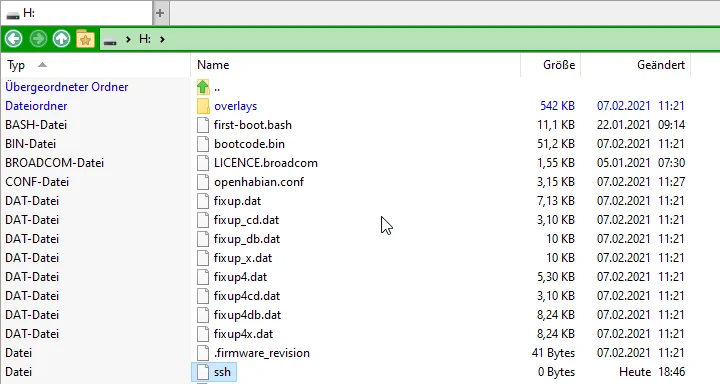
And for the Raspberry to connect to your WiFi, it needs the access data in a file named “wpa_supplicant.conf”.
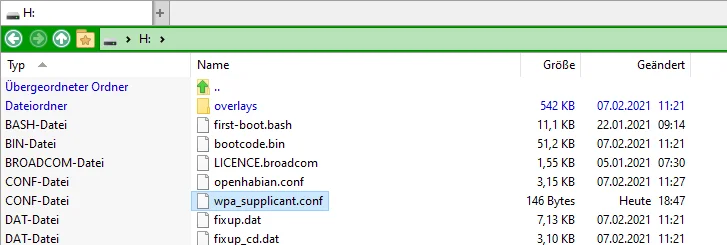
The content of this file is created with an editor like notepad and should read as follows:
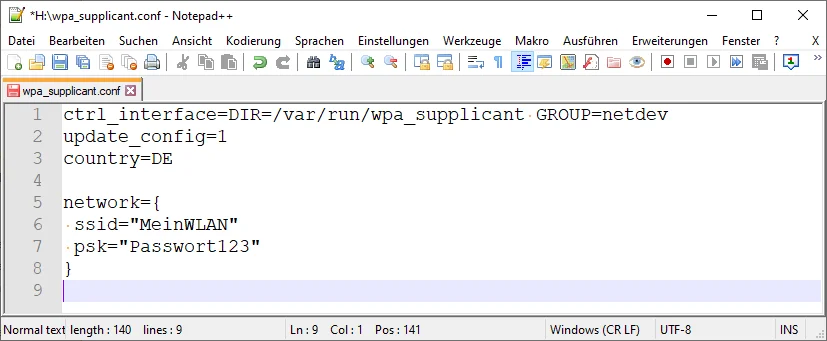
ctrl_interface=DIR=/var/run/wpa_supplicant GROUP=netdev
update_config=1
country=DE

network={
 ssid="MyWiFi"
 psk="Password123"
}
Of course, replace the values at the bottom accordingly.
4) First Boot
That’s it, now just properly eject the SD card, insert it into the Raspberry Pi, and then connect the power cable. After a few minutes of waiting, it should have connected to your WiFi.
5) Connecting via SSH
For this, we connect to the system using Putty. It can be reached at:
Host: raspberrypi, Port: 22
User: pi, Password: raspberry
The warning message can be confirmed with “Yes” when connecting for the first time; the system is new, and therefore the key is as well. All OK.

6) Basic Configuration
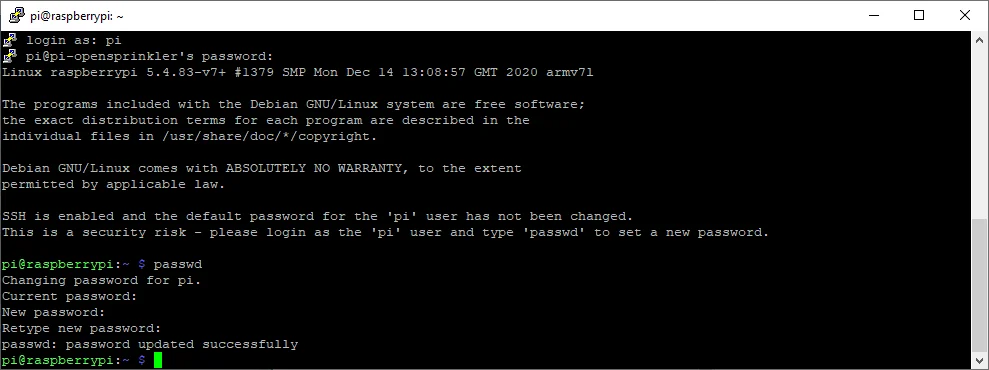
In the SSH console, you should first set a new password for security reasons. This can be done with the following command:
passwdEnter “raspberry” as the standard password one last time and then enter a secure password of your own twice to confirm.
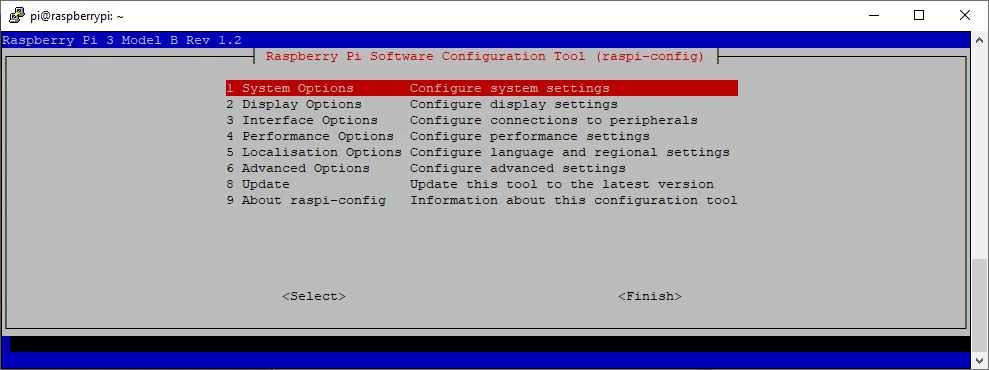
Next, you should change the hostname, especially if you have multiple Raspberrys in the network that might otherwise interfere with each other. This can be done conveniently via the Raspberry’s configuration tool:
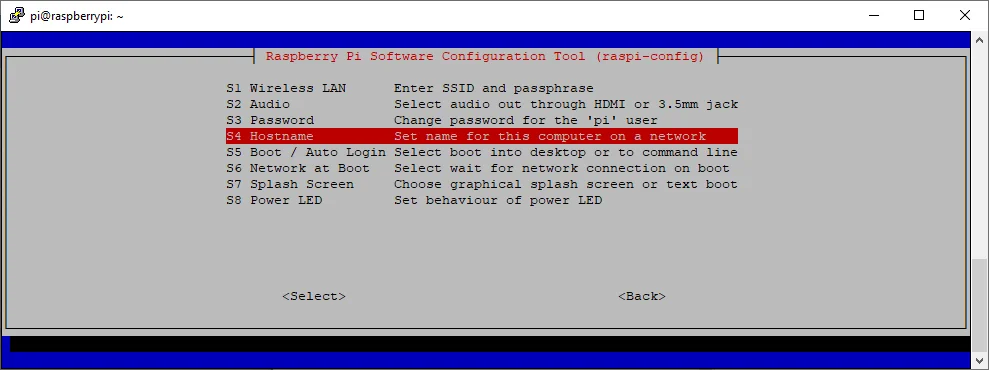
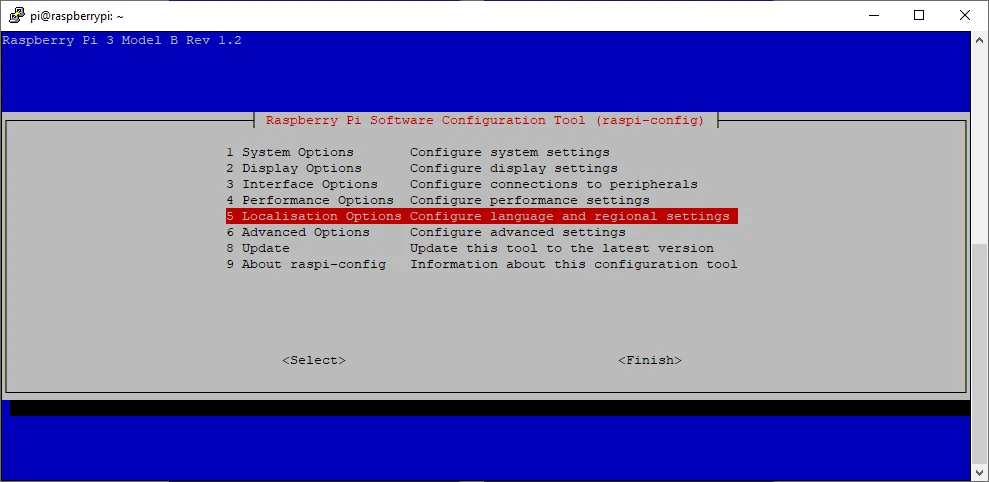
sudo raspi-configThere, select “1 System Options”.
Then “S4 Hostname”.
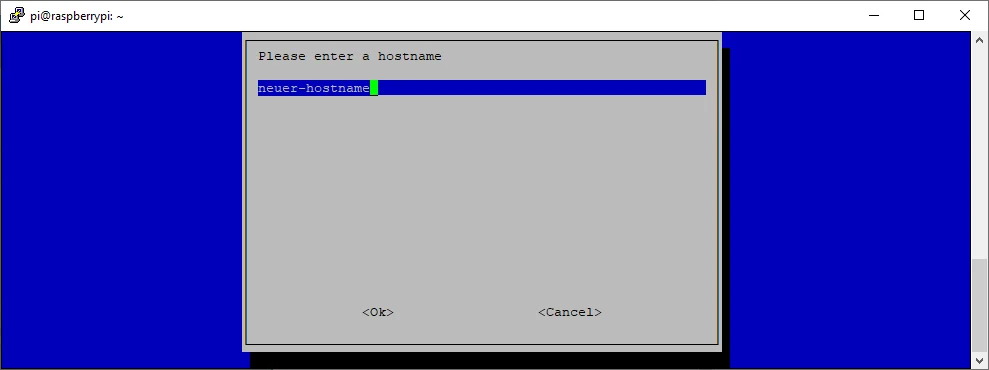
Confirm once that you adhere to the rules and only assign valid hostnames (and you really should; anything other than lowercase letters, digits, and the hyphen is a guarantee for trouble or at least cannot be entered).

The change will only take effect after a restart, which will now be offered to you. However, we can configure a bit more before that, so we decline.
You probably also want to set the timezone to your local one to avoid problems with daylight saving time, etc.:
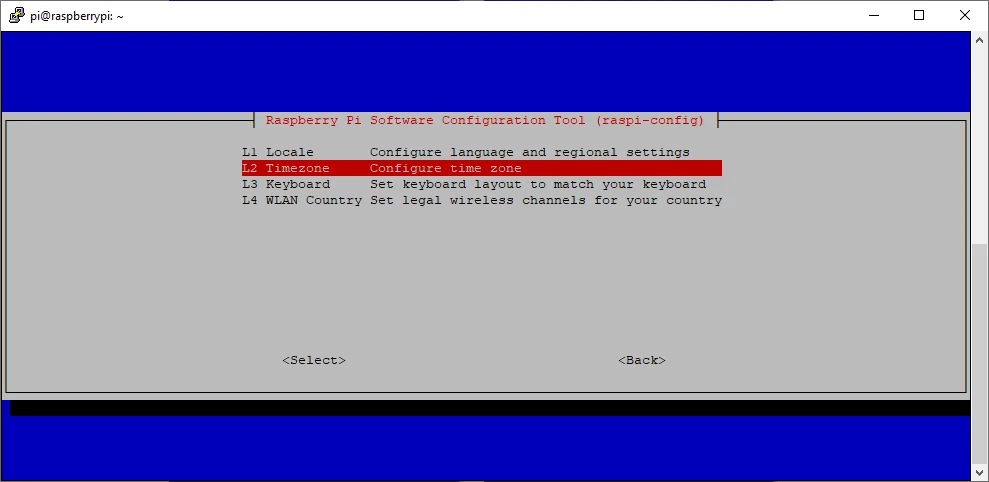
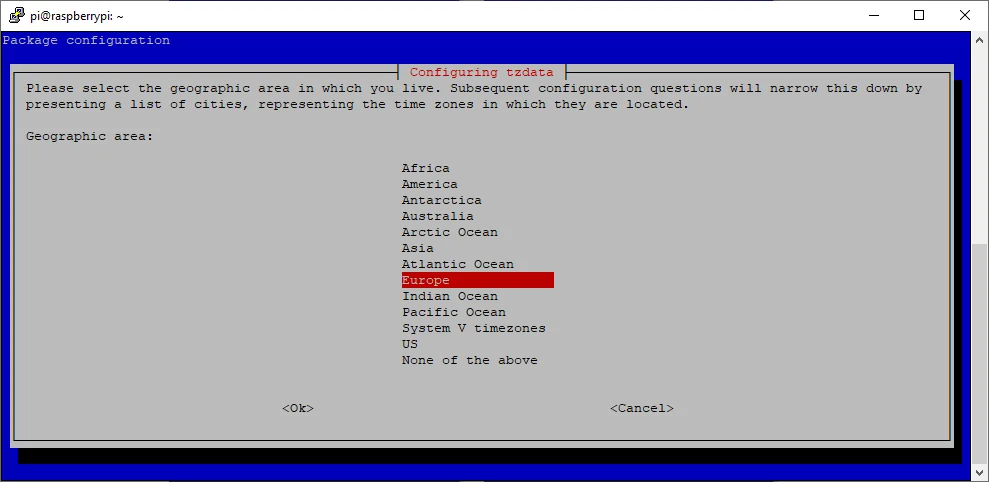
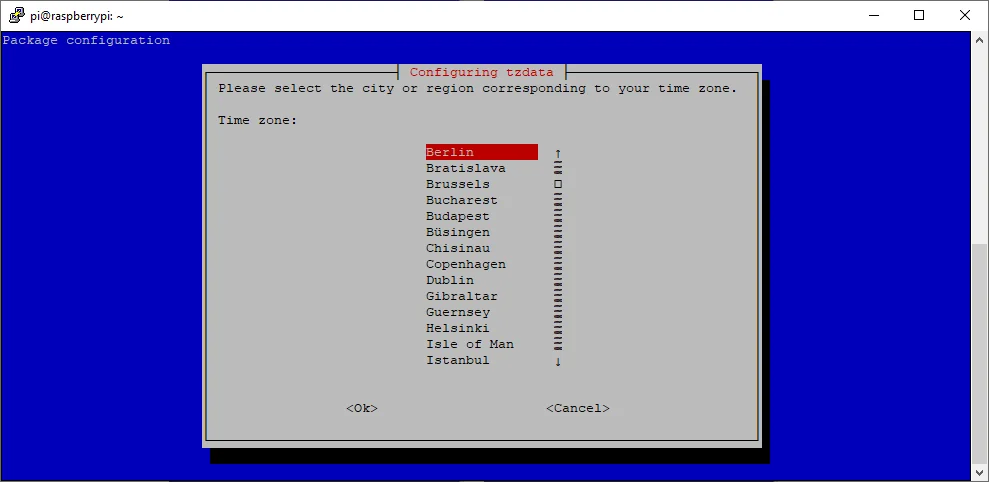
For this, select “5 Localization Options” > “L2 Timezone” and choose your appropriate timezone (this example uses Europe/Berlin):
Now you can exit the configuration tool and update the system to the very latest version:
sudo apt-get update && sudo apt-get upgrade
This is also a good time to activate the filesystem check at boot.
After everything is configured, you can restart the Raspberry Pi with
sudo rebootand shortly afterward, it will be ready for use and accessible in the network under the chosen hostname.
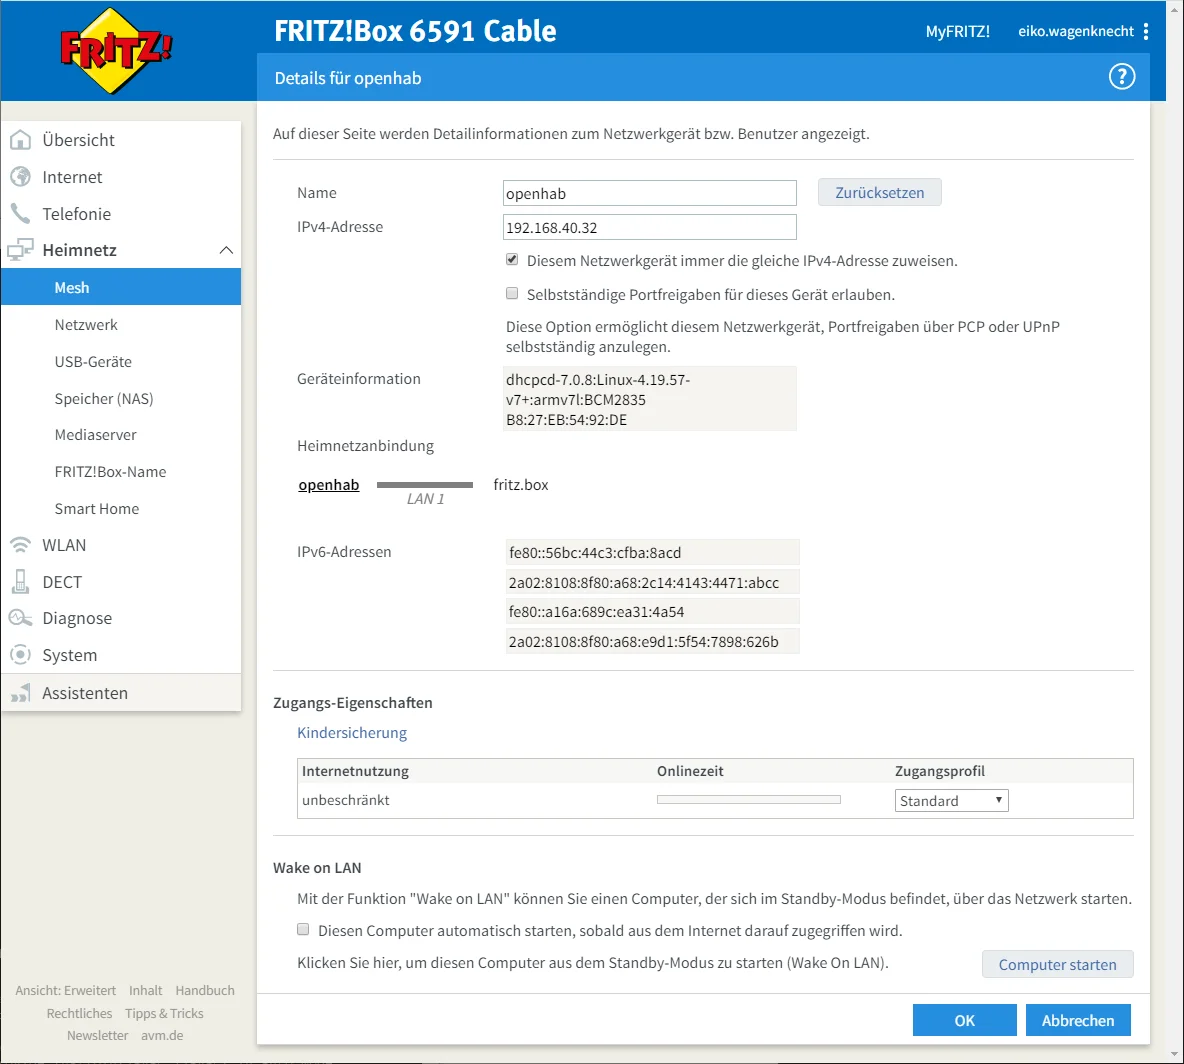
7) Optional: Setting a Static IP Address
Many use cases require the Raspberry to run with a static IP address. Therefore, it makes sense to define this now. This is easiest if you use a FritzBox or a router with similar functionality. Then the IP can simply be configured there as a static DHCP lease, in the case of the FritzBox with the checkbox “Always assign the same IPv4 address to this network device.”
In the example screenshot, you can see this for a Raspberry with the hostname “openhab” and the IP “192.168.40.32”. Of course, you need to replace this accordingly.
8) Optional: Creating a Backup
Either now or after you have completed your further setup of the Raspberry is a good time to create a backup. I explain how to do this in another post for openHAB, but the methods for complete backup work for any Raspberry.
Conclusion
I look forward to your comments on whether this post has helped you. Feel free to write if you have questions or if something remains unclear. Or if you were able to implement exciting further automation projects based on this 🙂
No Comments? No Problem.
This blog doesn't support comments, but your thoughts and questions are always welcome. Reach out through the contact details at the bottom of the page.
Support Me
If you found this page helpful and want to say thanks, you can support me here.